Stuart de Haro had a short video on how to make roses from thin stock sheet metal. I printed out the pdf plans and purchased some brass, aluminum and tin coated steel from Ace Hardware. The thickness of the sheets vary (brass & aluminum are 0.016", steel is 0.008"), so it will be interesting how this affects shaping them.
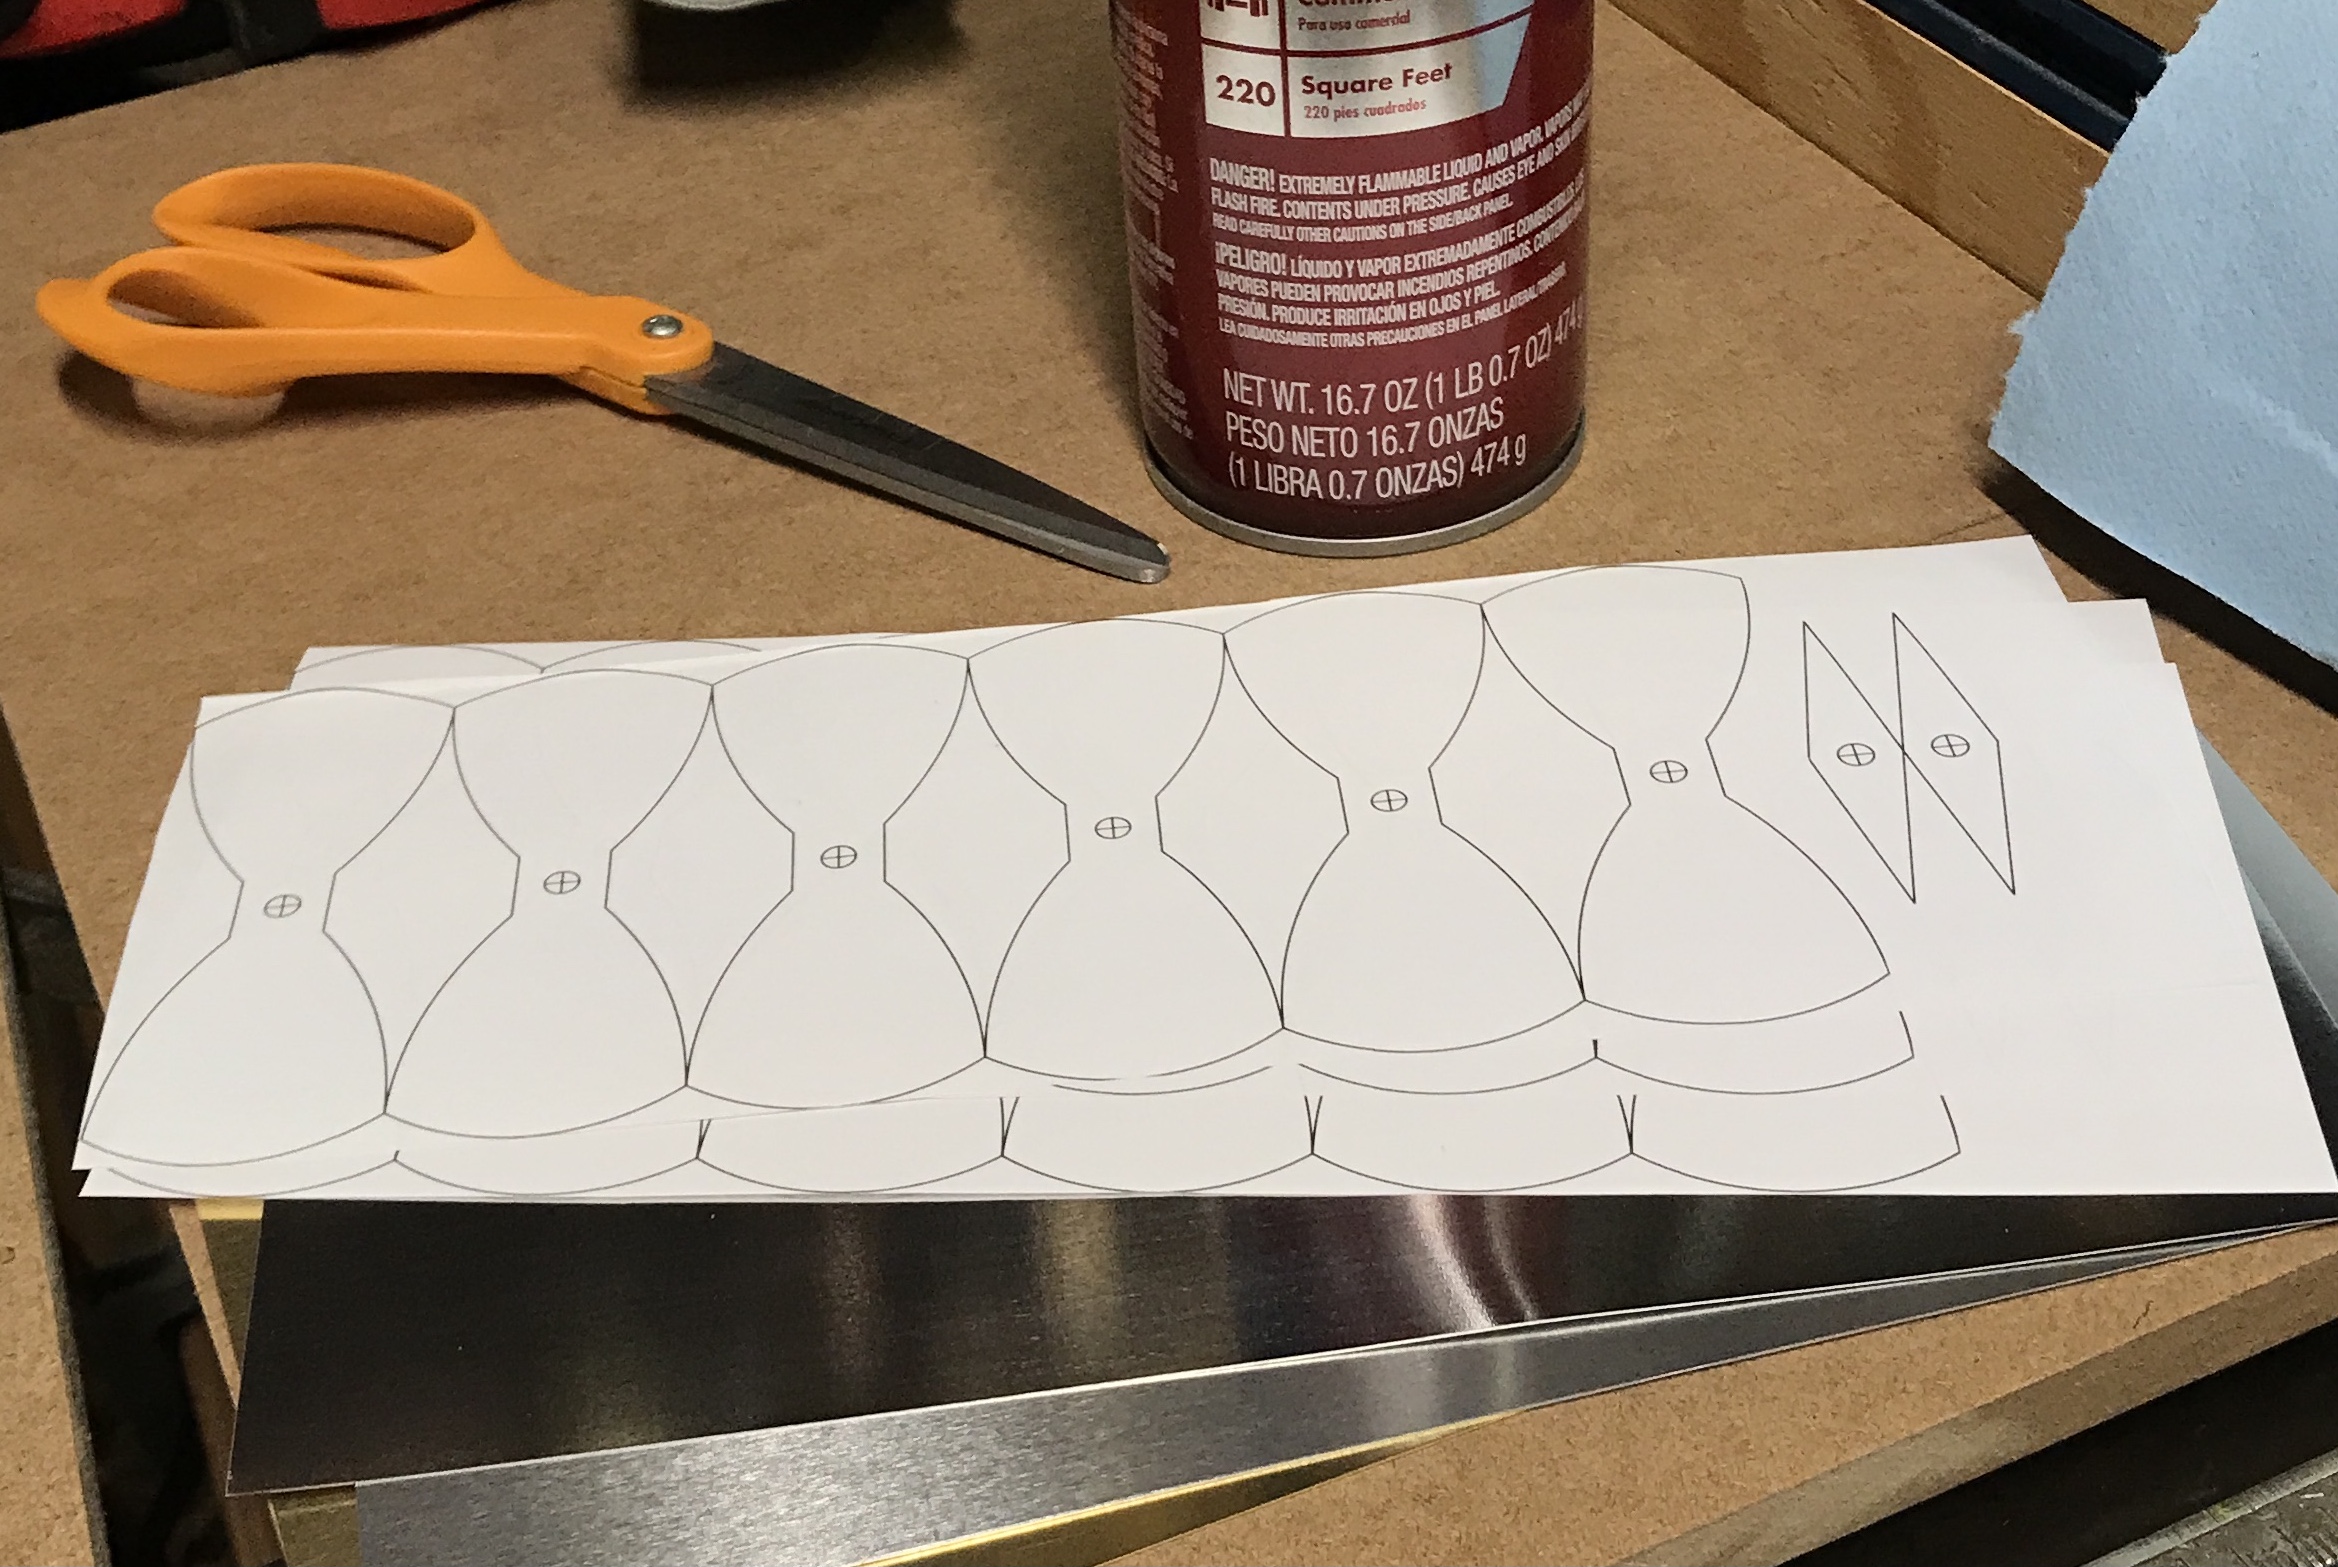
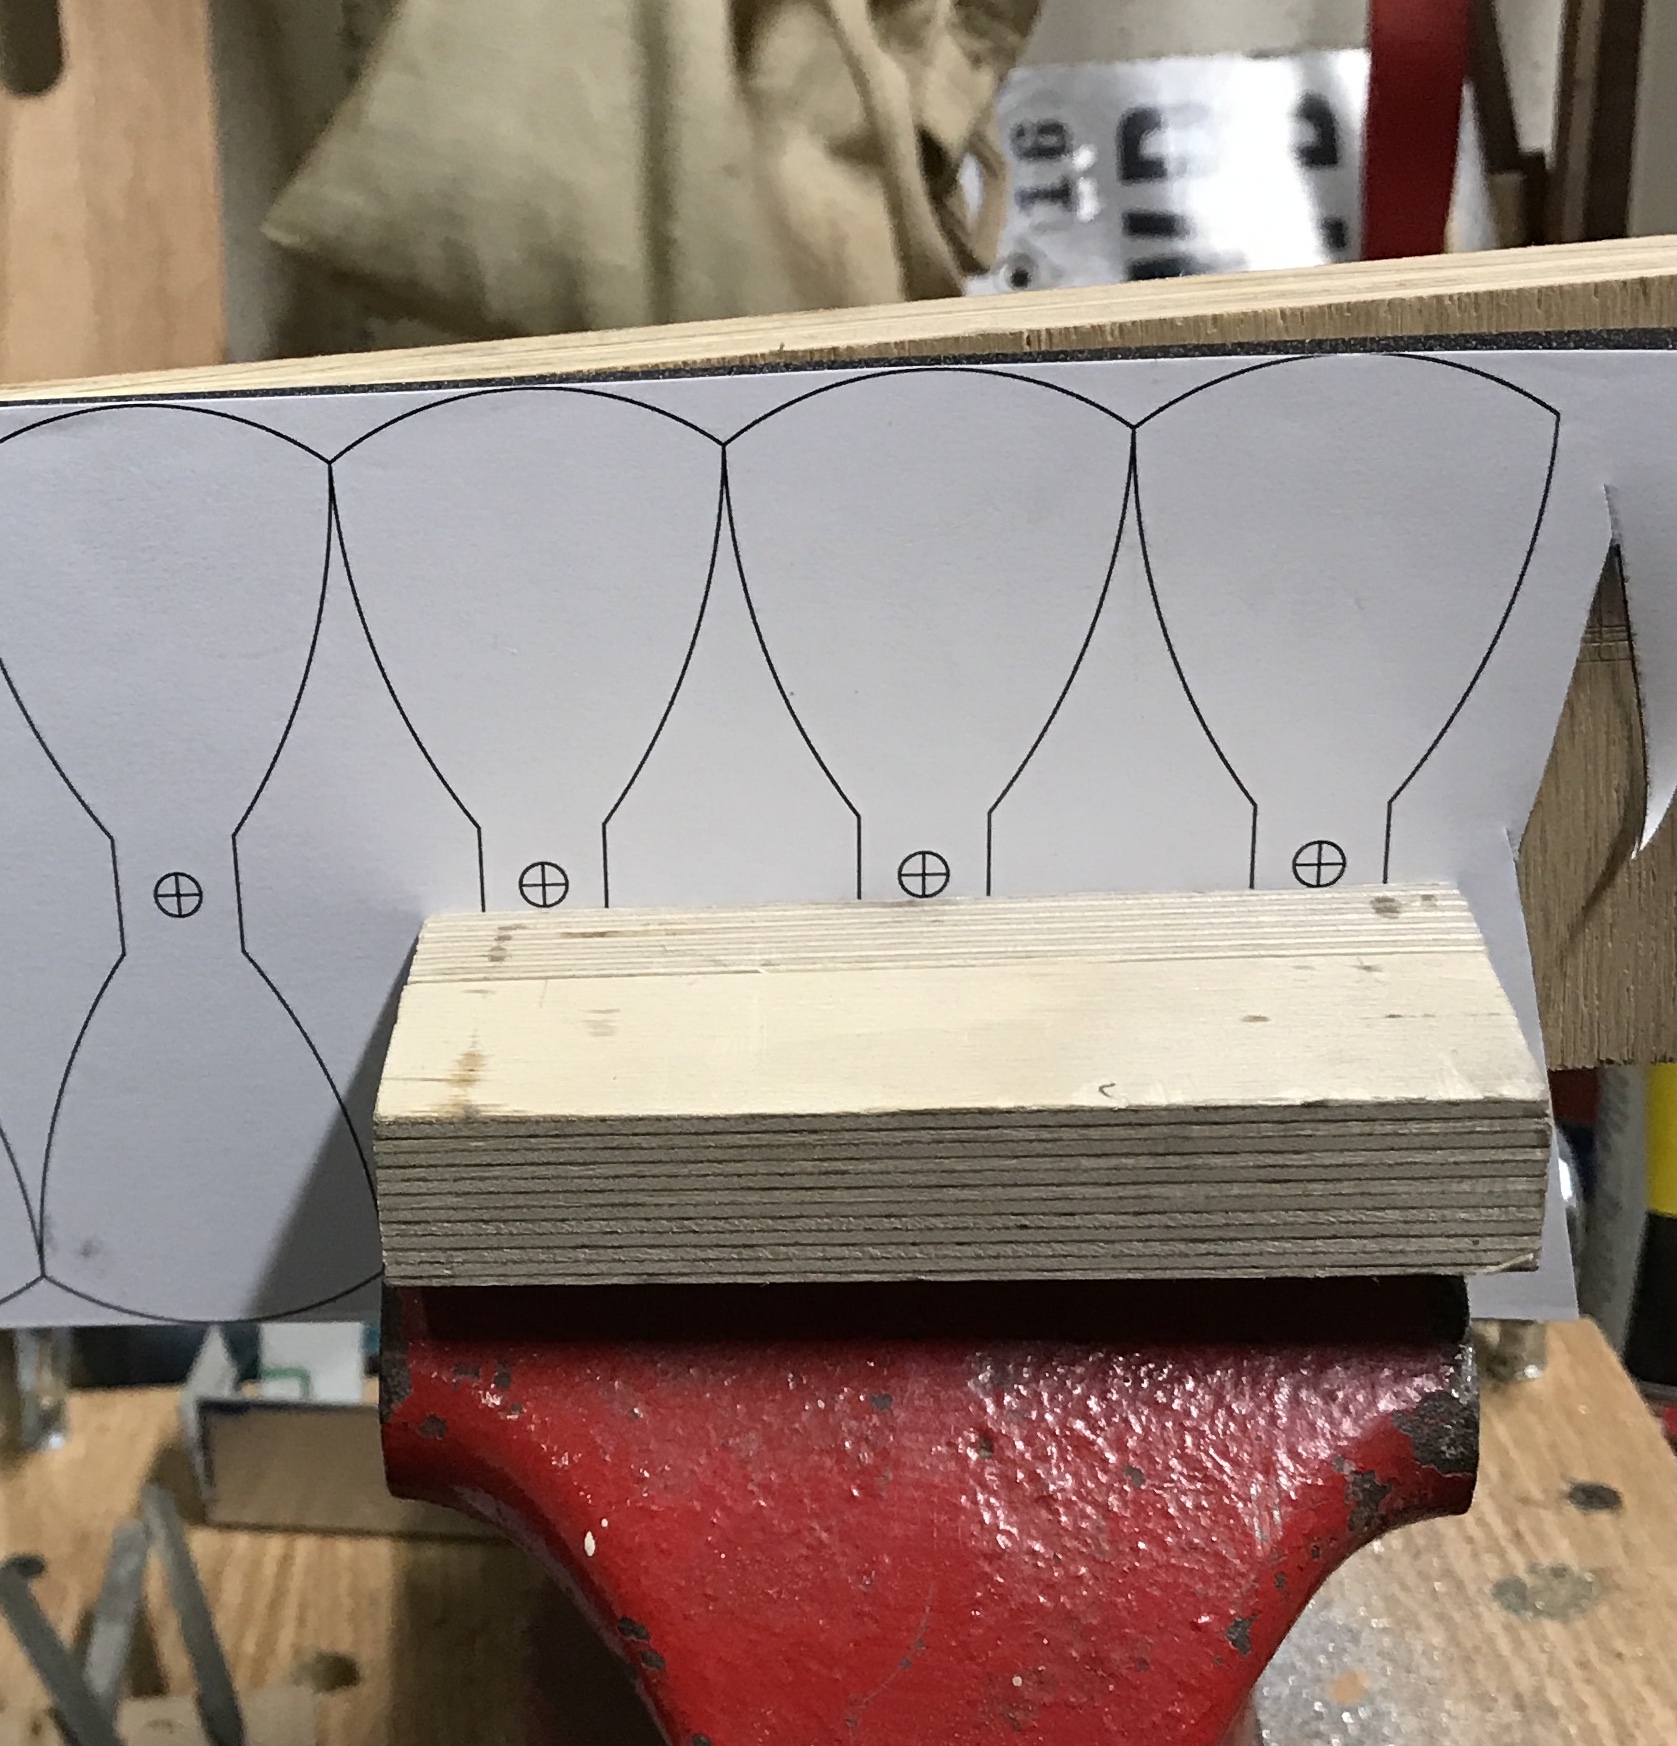
The video suggested just placing the printout on the metal and wiping with acetone. Supposedly the ink would transfer to the metal. I saw no transfer whatsoever. The plans were cut out. The metal was sprayed with the 3M 77 adhesive. The paper was applied to the metal. The holes were then drilled with the sheet stock held between two pieces of wood in the vise.
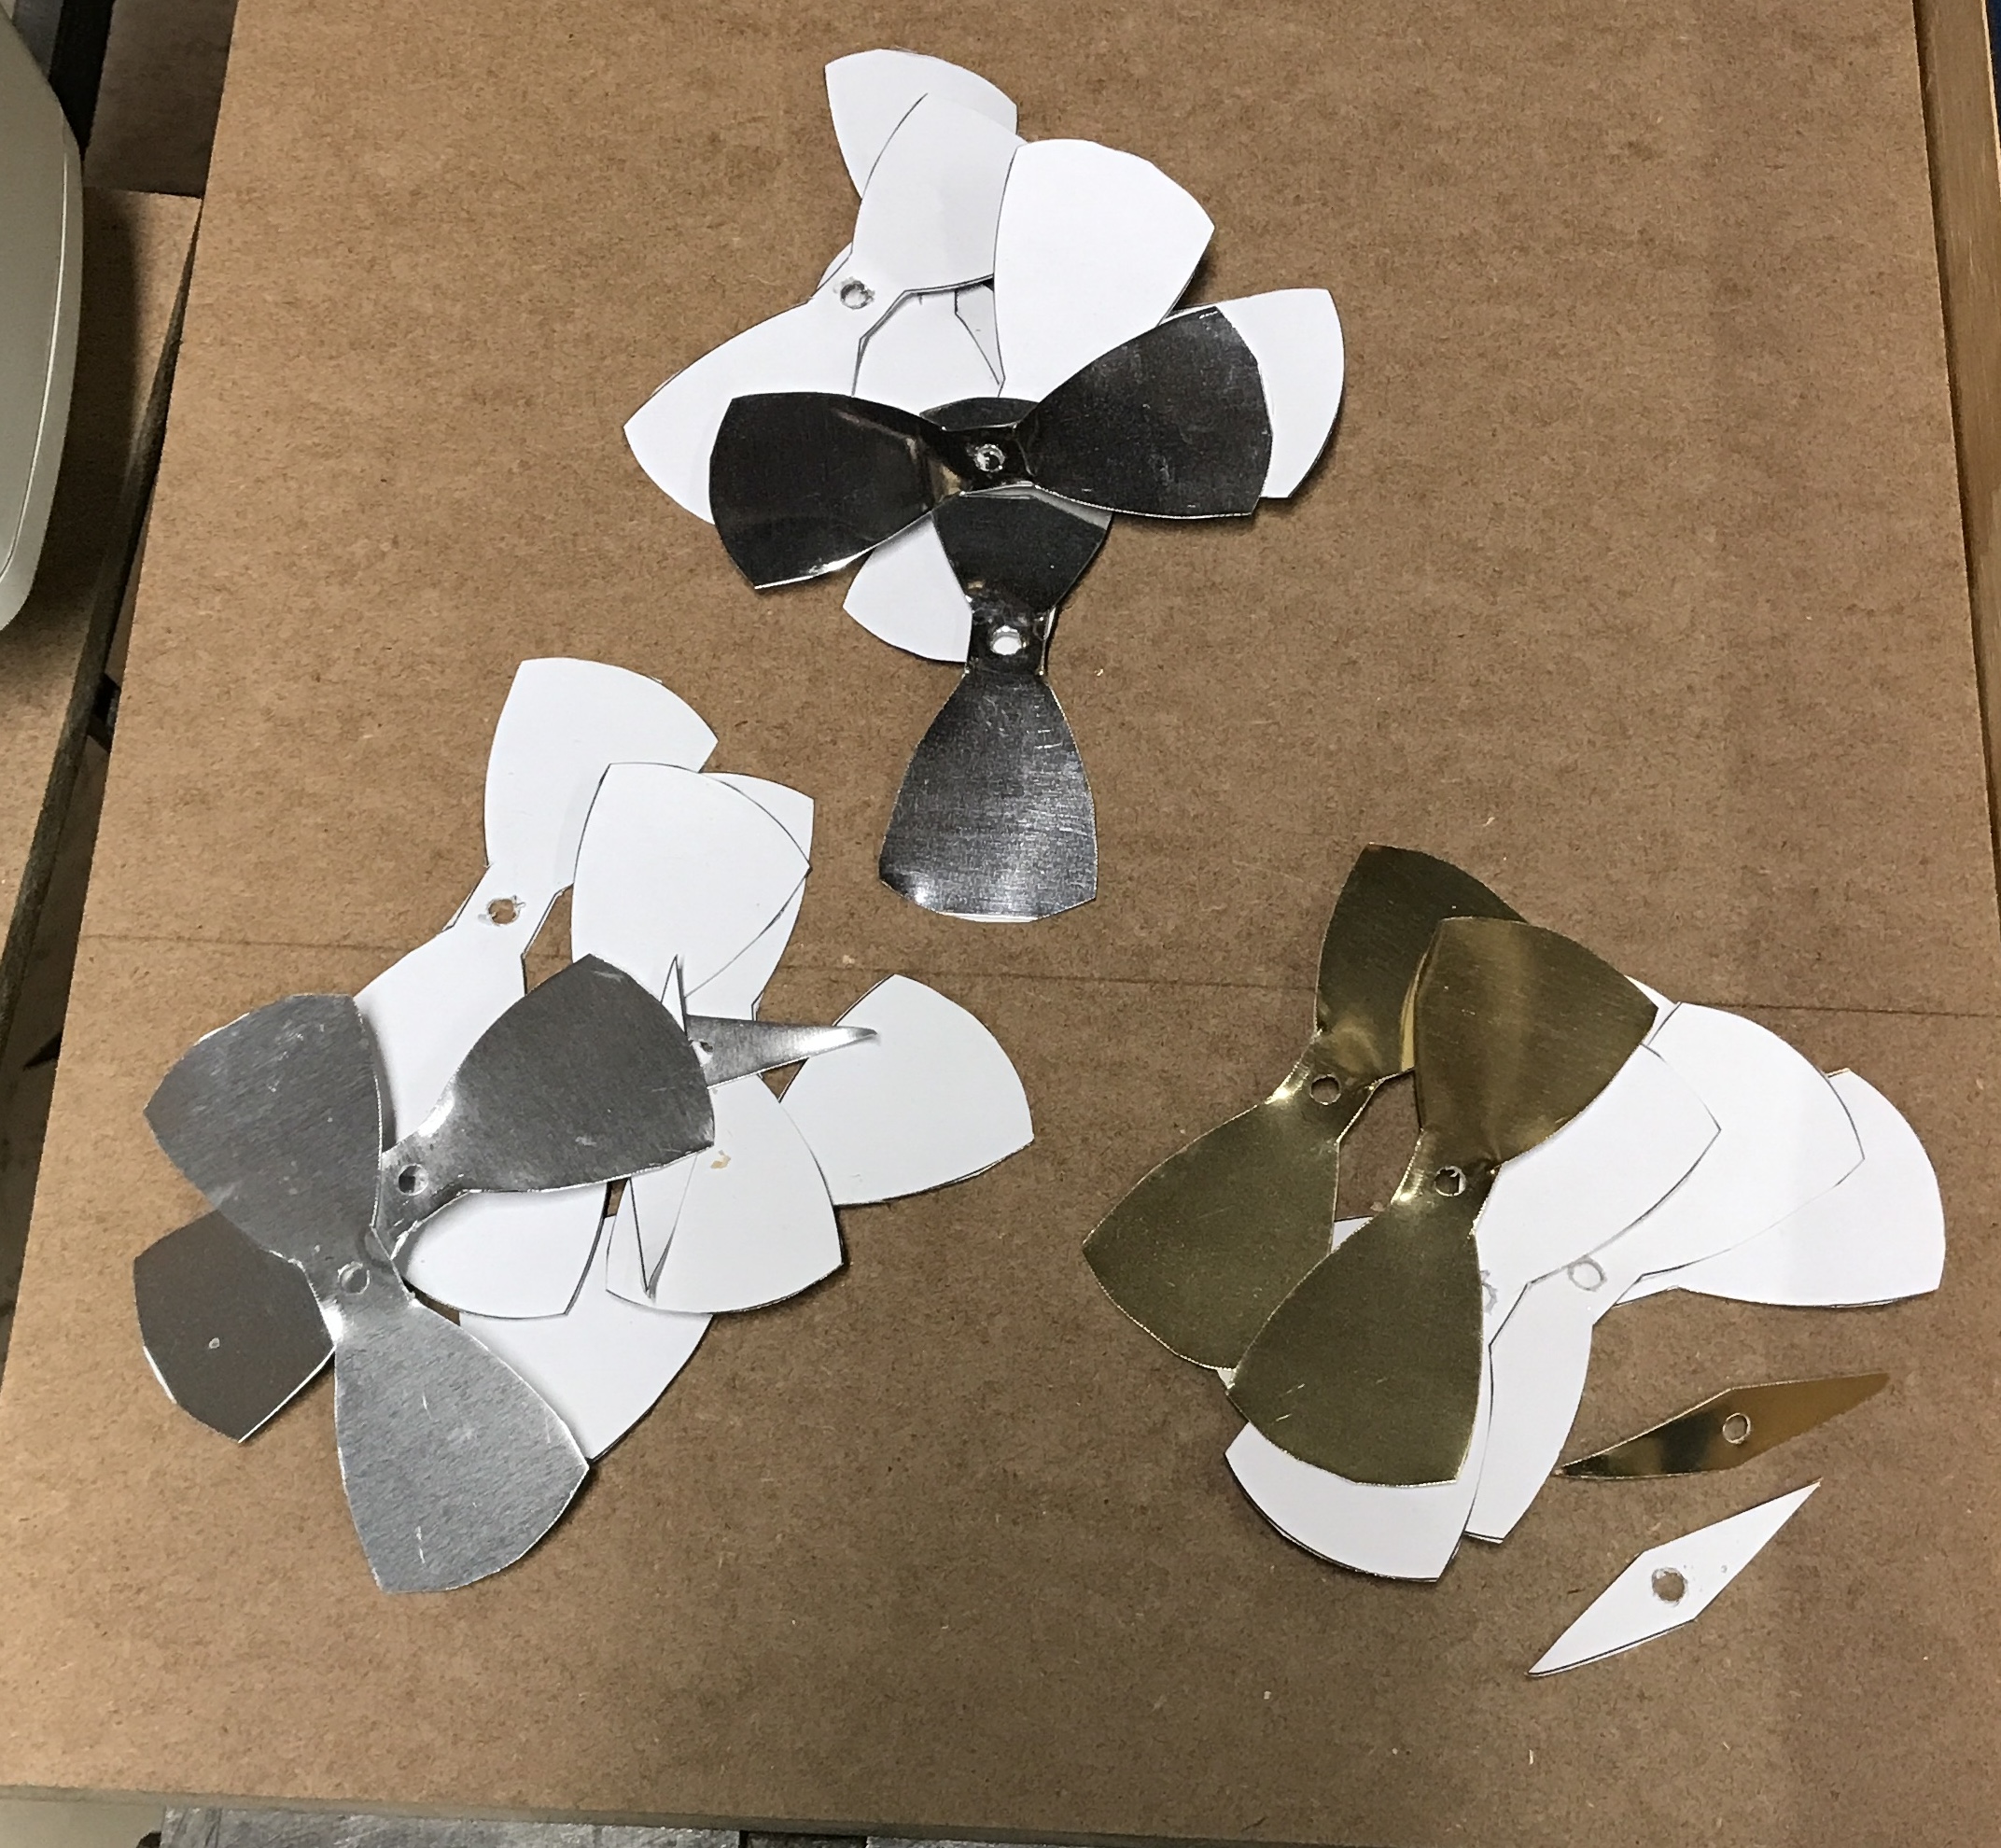
After drilling the petals and leaves were cut from the sheet. They were cut out with tin snips. The brass was especially difficult as it required more force to cut. My hand was left all cramped up. A glove was worn on the hand holding the part to minimize fingerprints on the metal.
Deburring is next. The holes need some major burr removal, while the edges need to be rounded over. Since I don't have a Scotch Brite deburring wheel, I will use the Dremel in its vise holder with some type of deburring wheel or sanding cylinder. A tiny Scotch Brite wheel was used. In fact two were used up. It did not do a very good job in the holes in the tin coated steel. These were significantly rougher than the others.
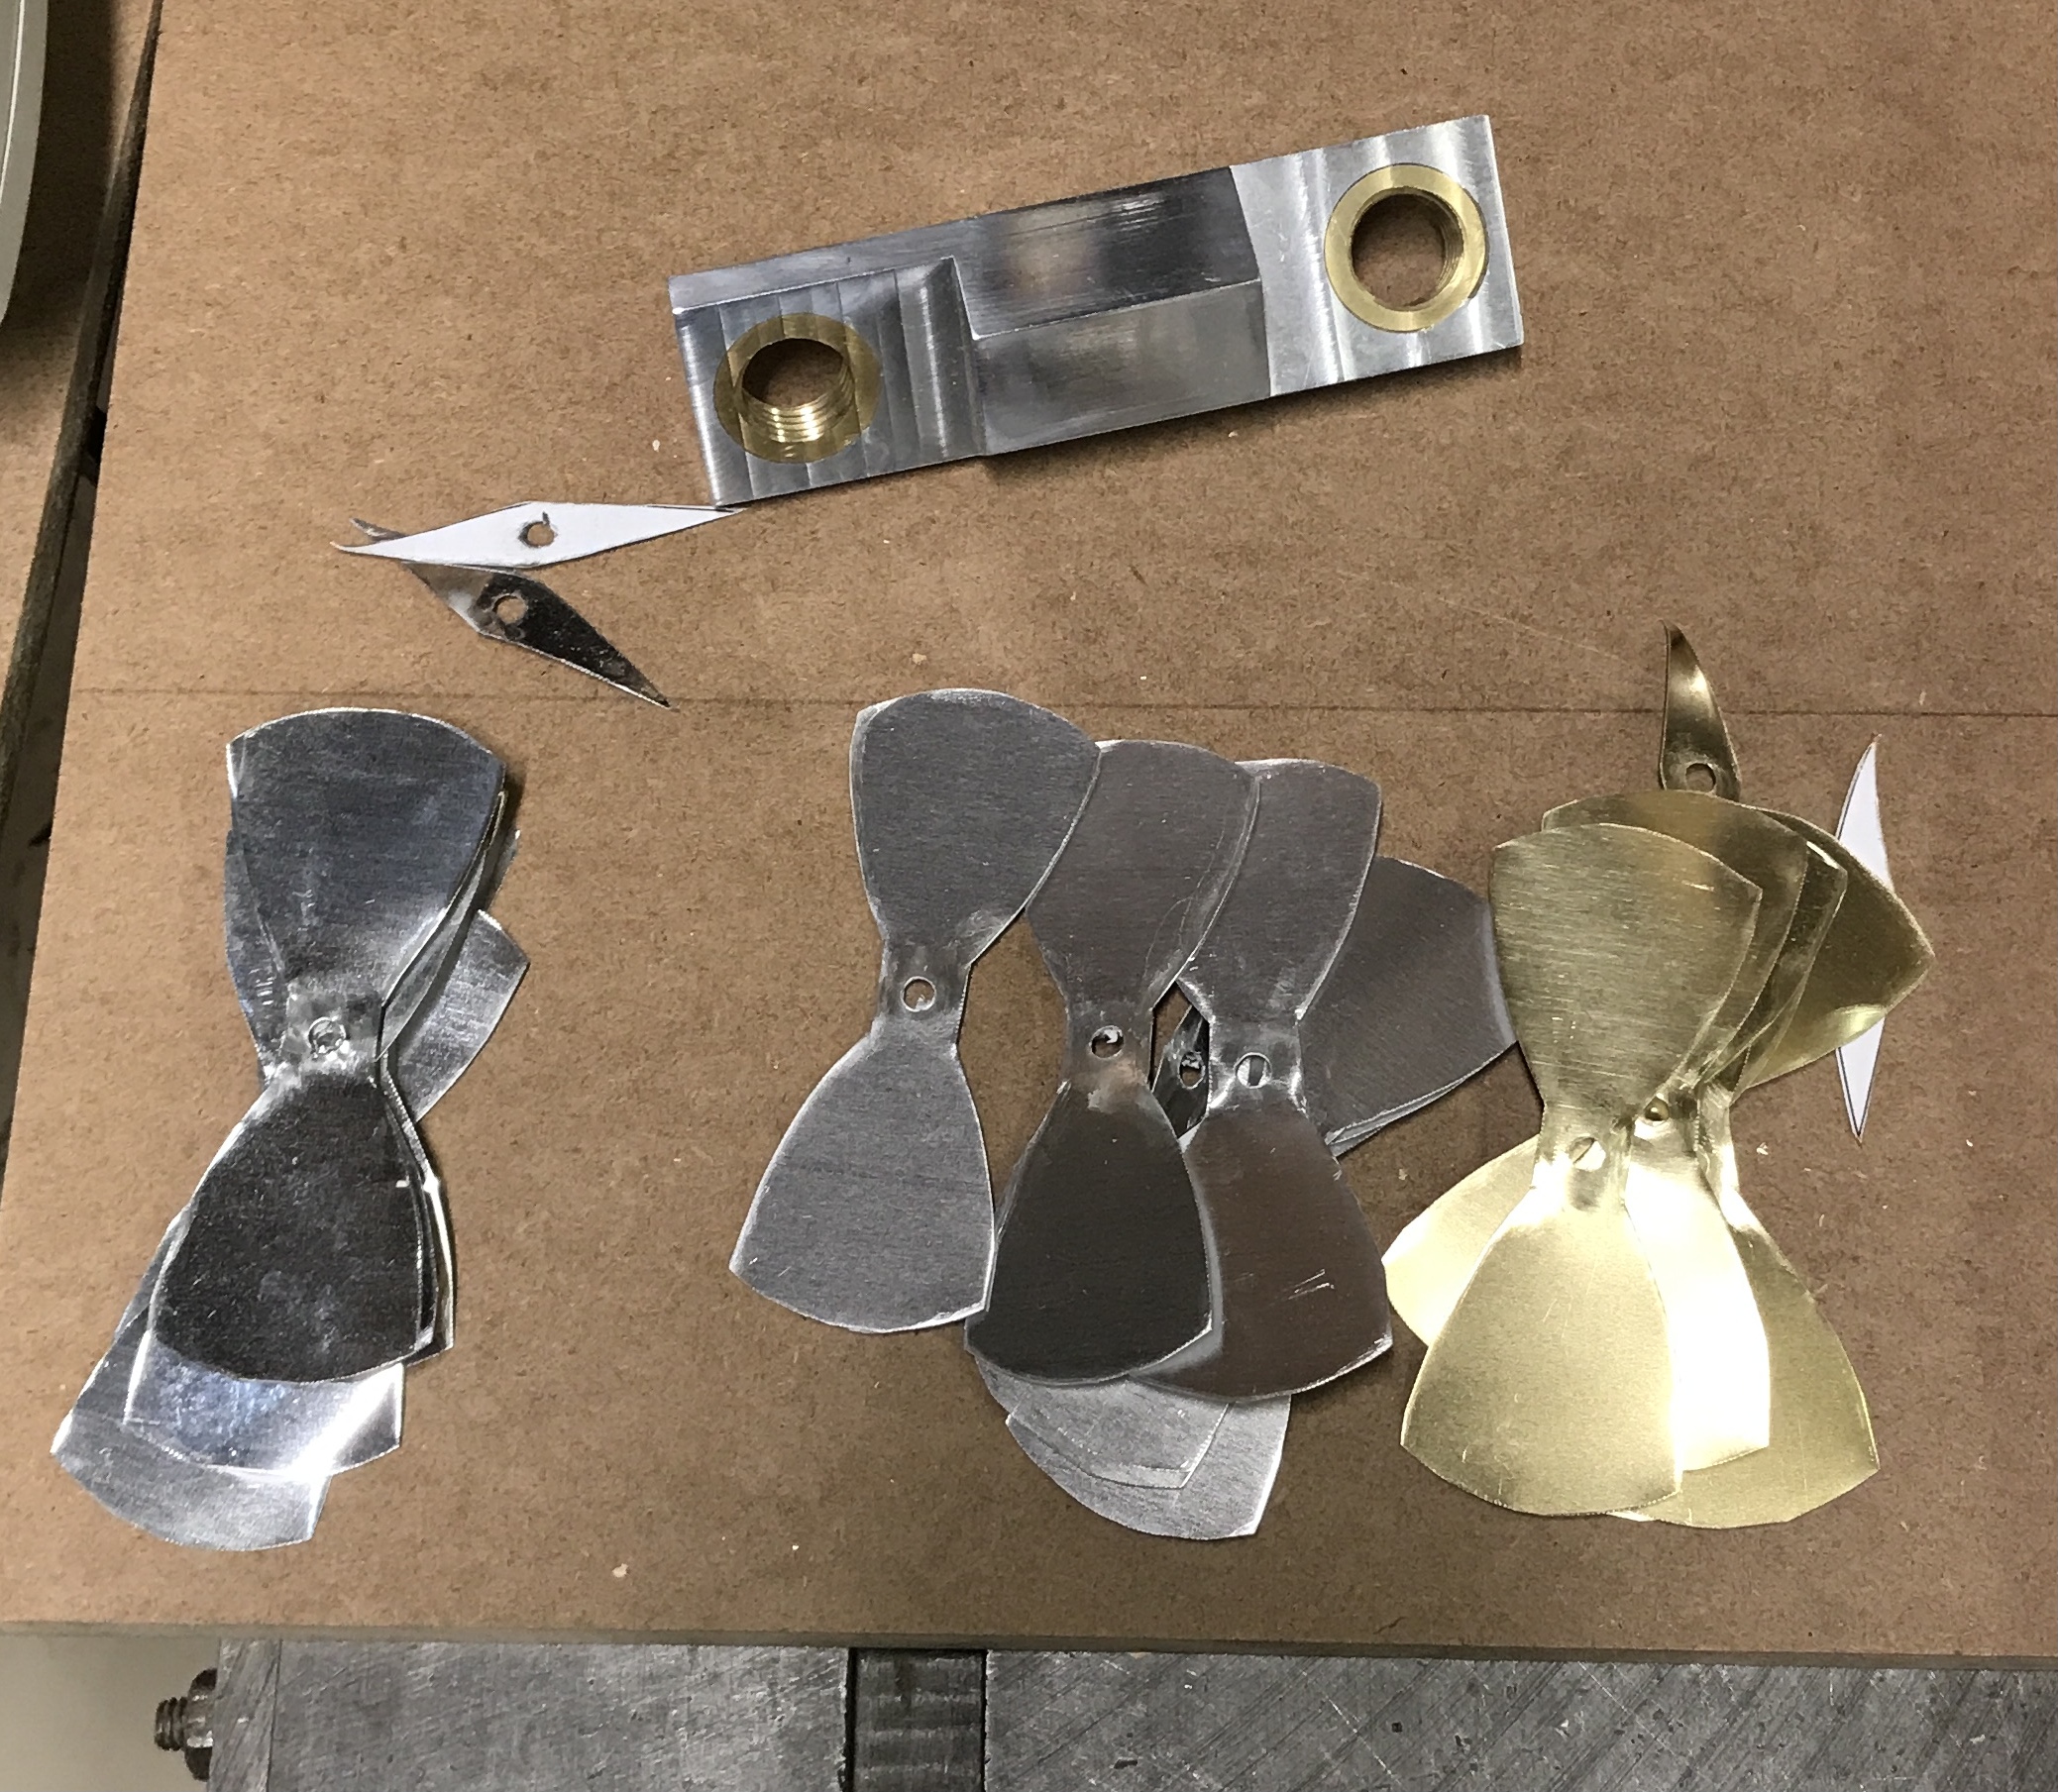
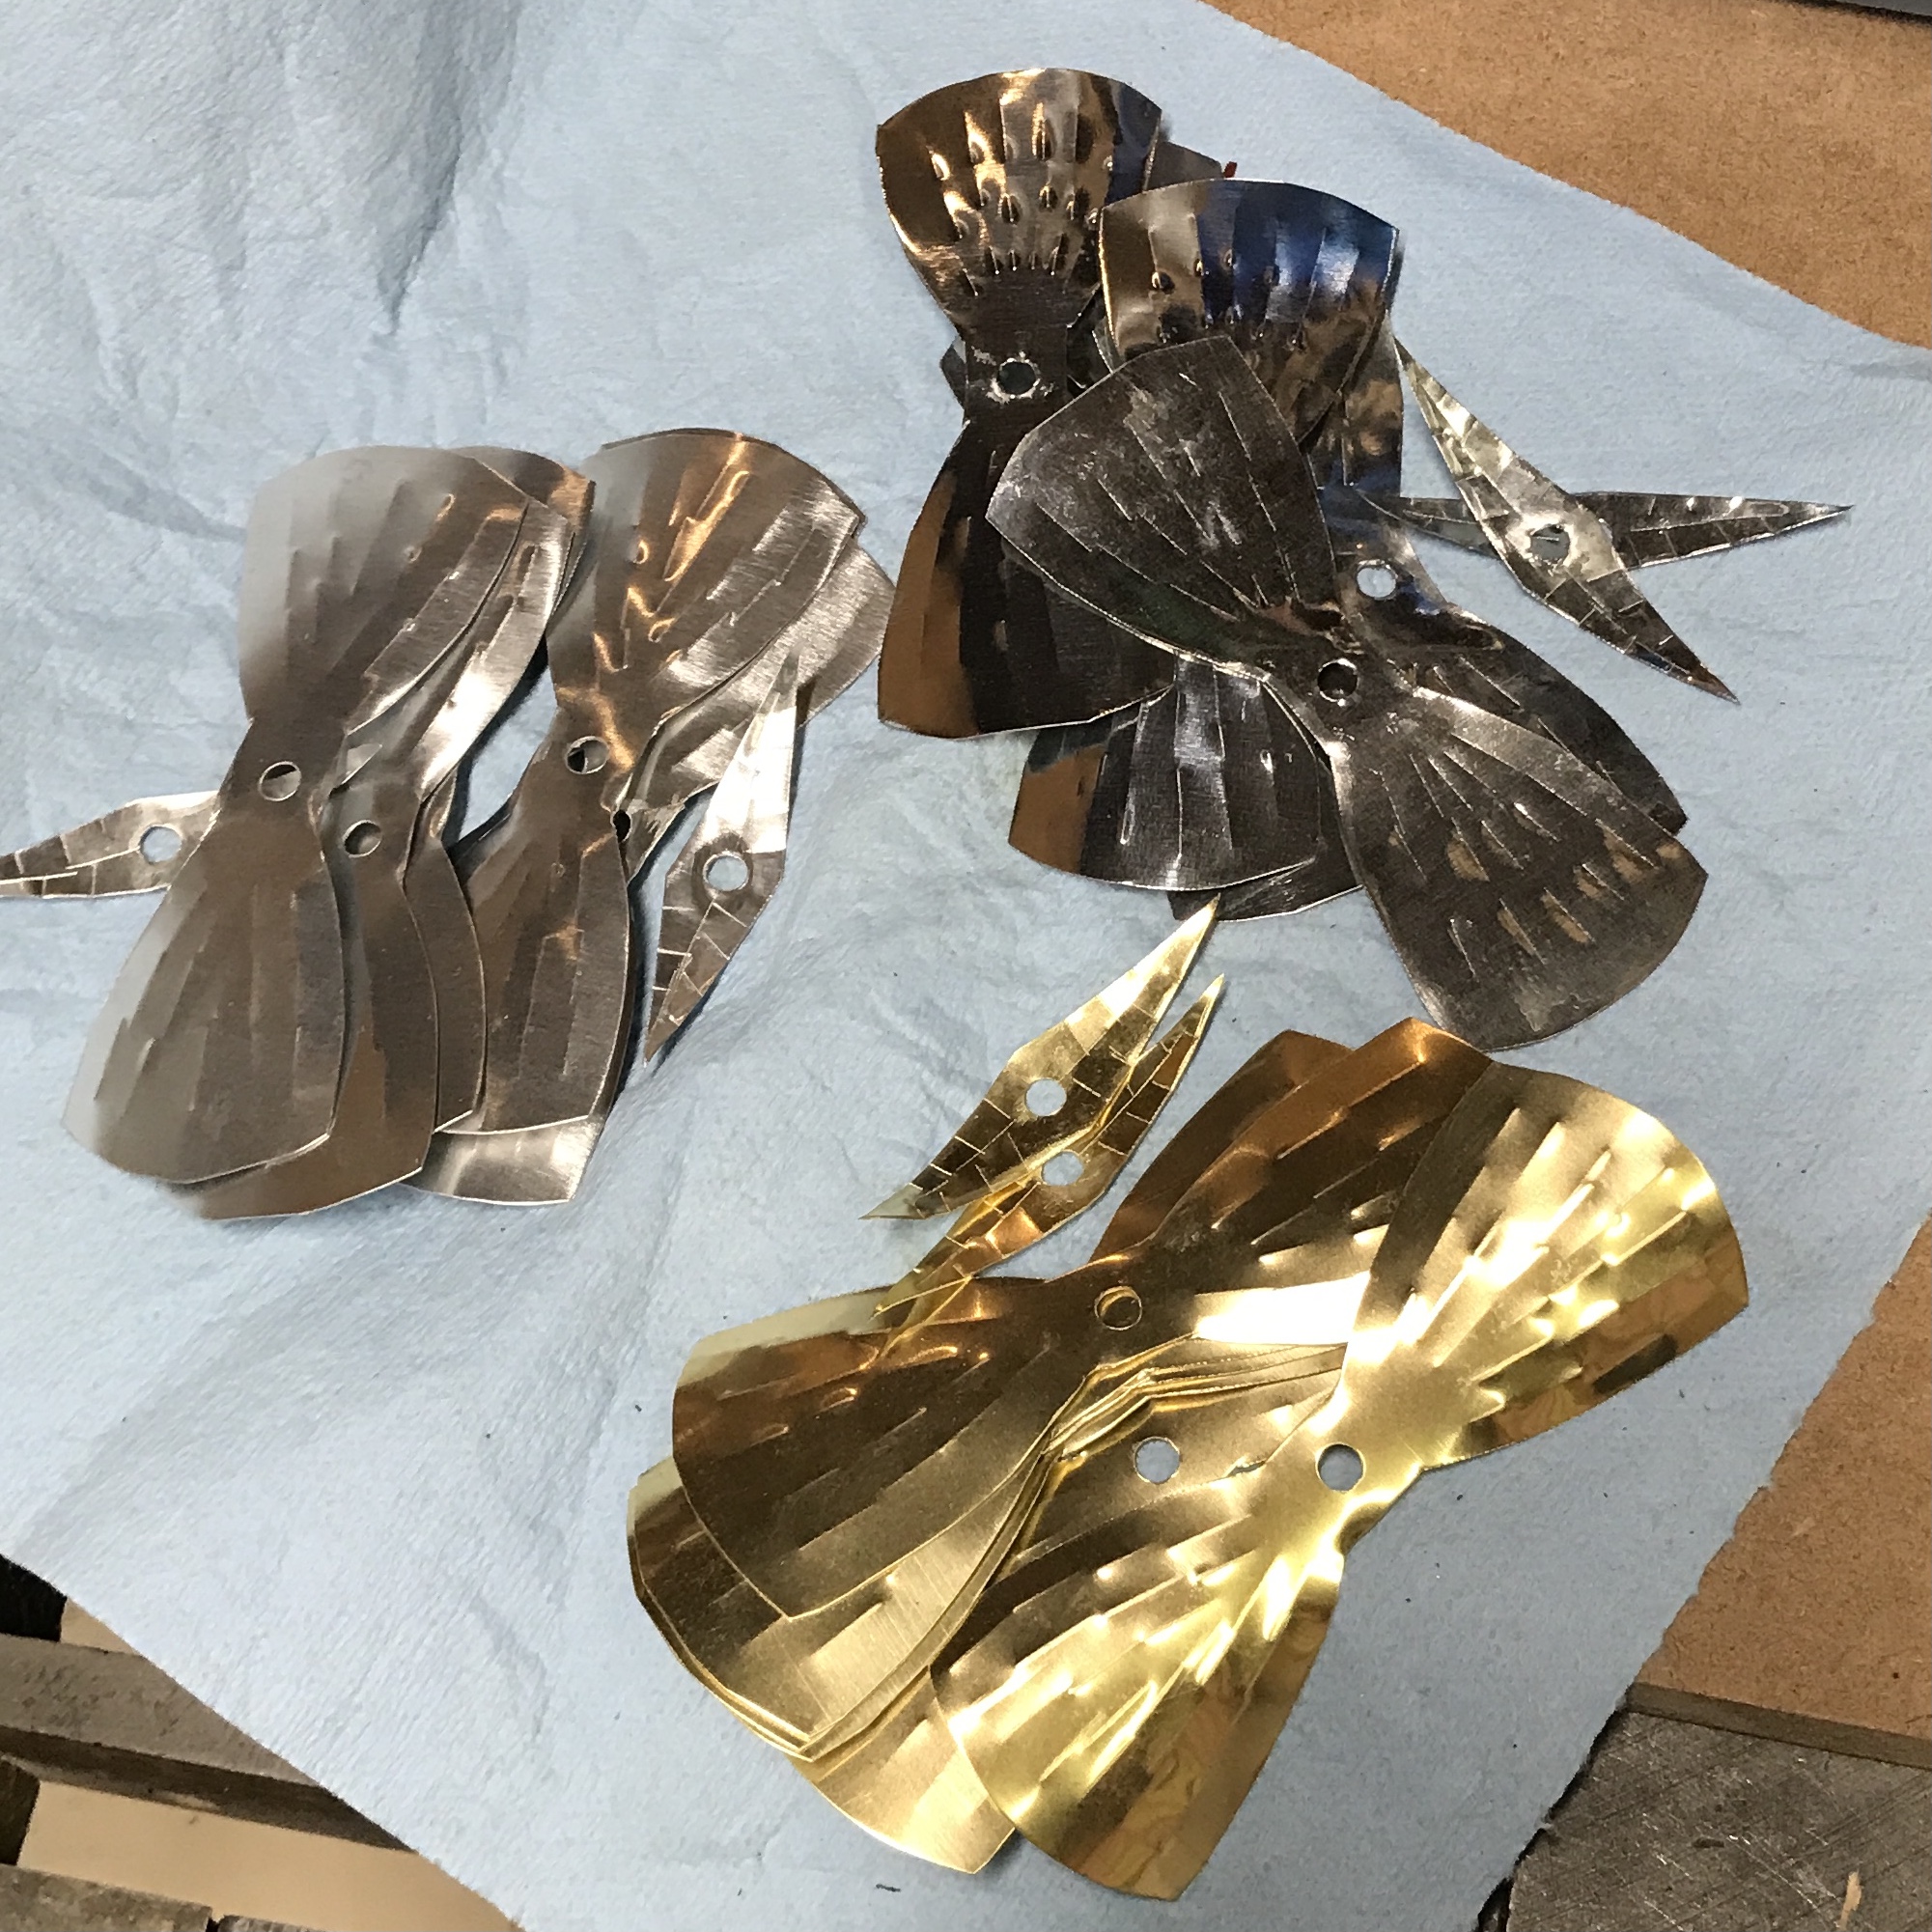
The veins were put in the petals and in the small leaves. A cold chisel was used along with a ball peen hammer to add some dents. Two petals of each metal had extra dents added. These will be the outer petals. The photos show the dents in the tin coated steel and the completed 'denting'.
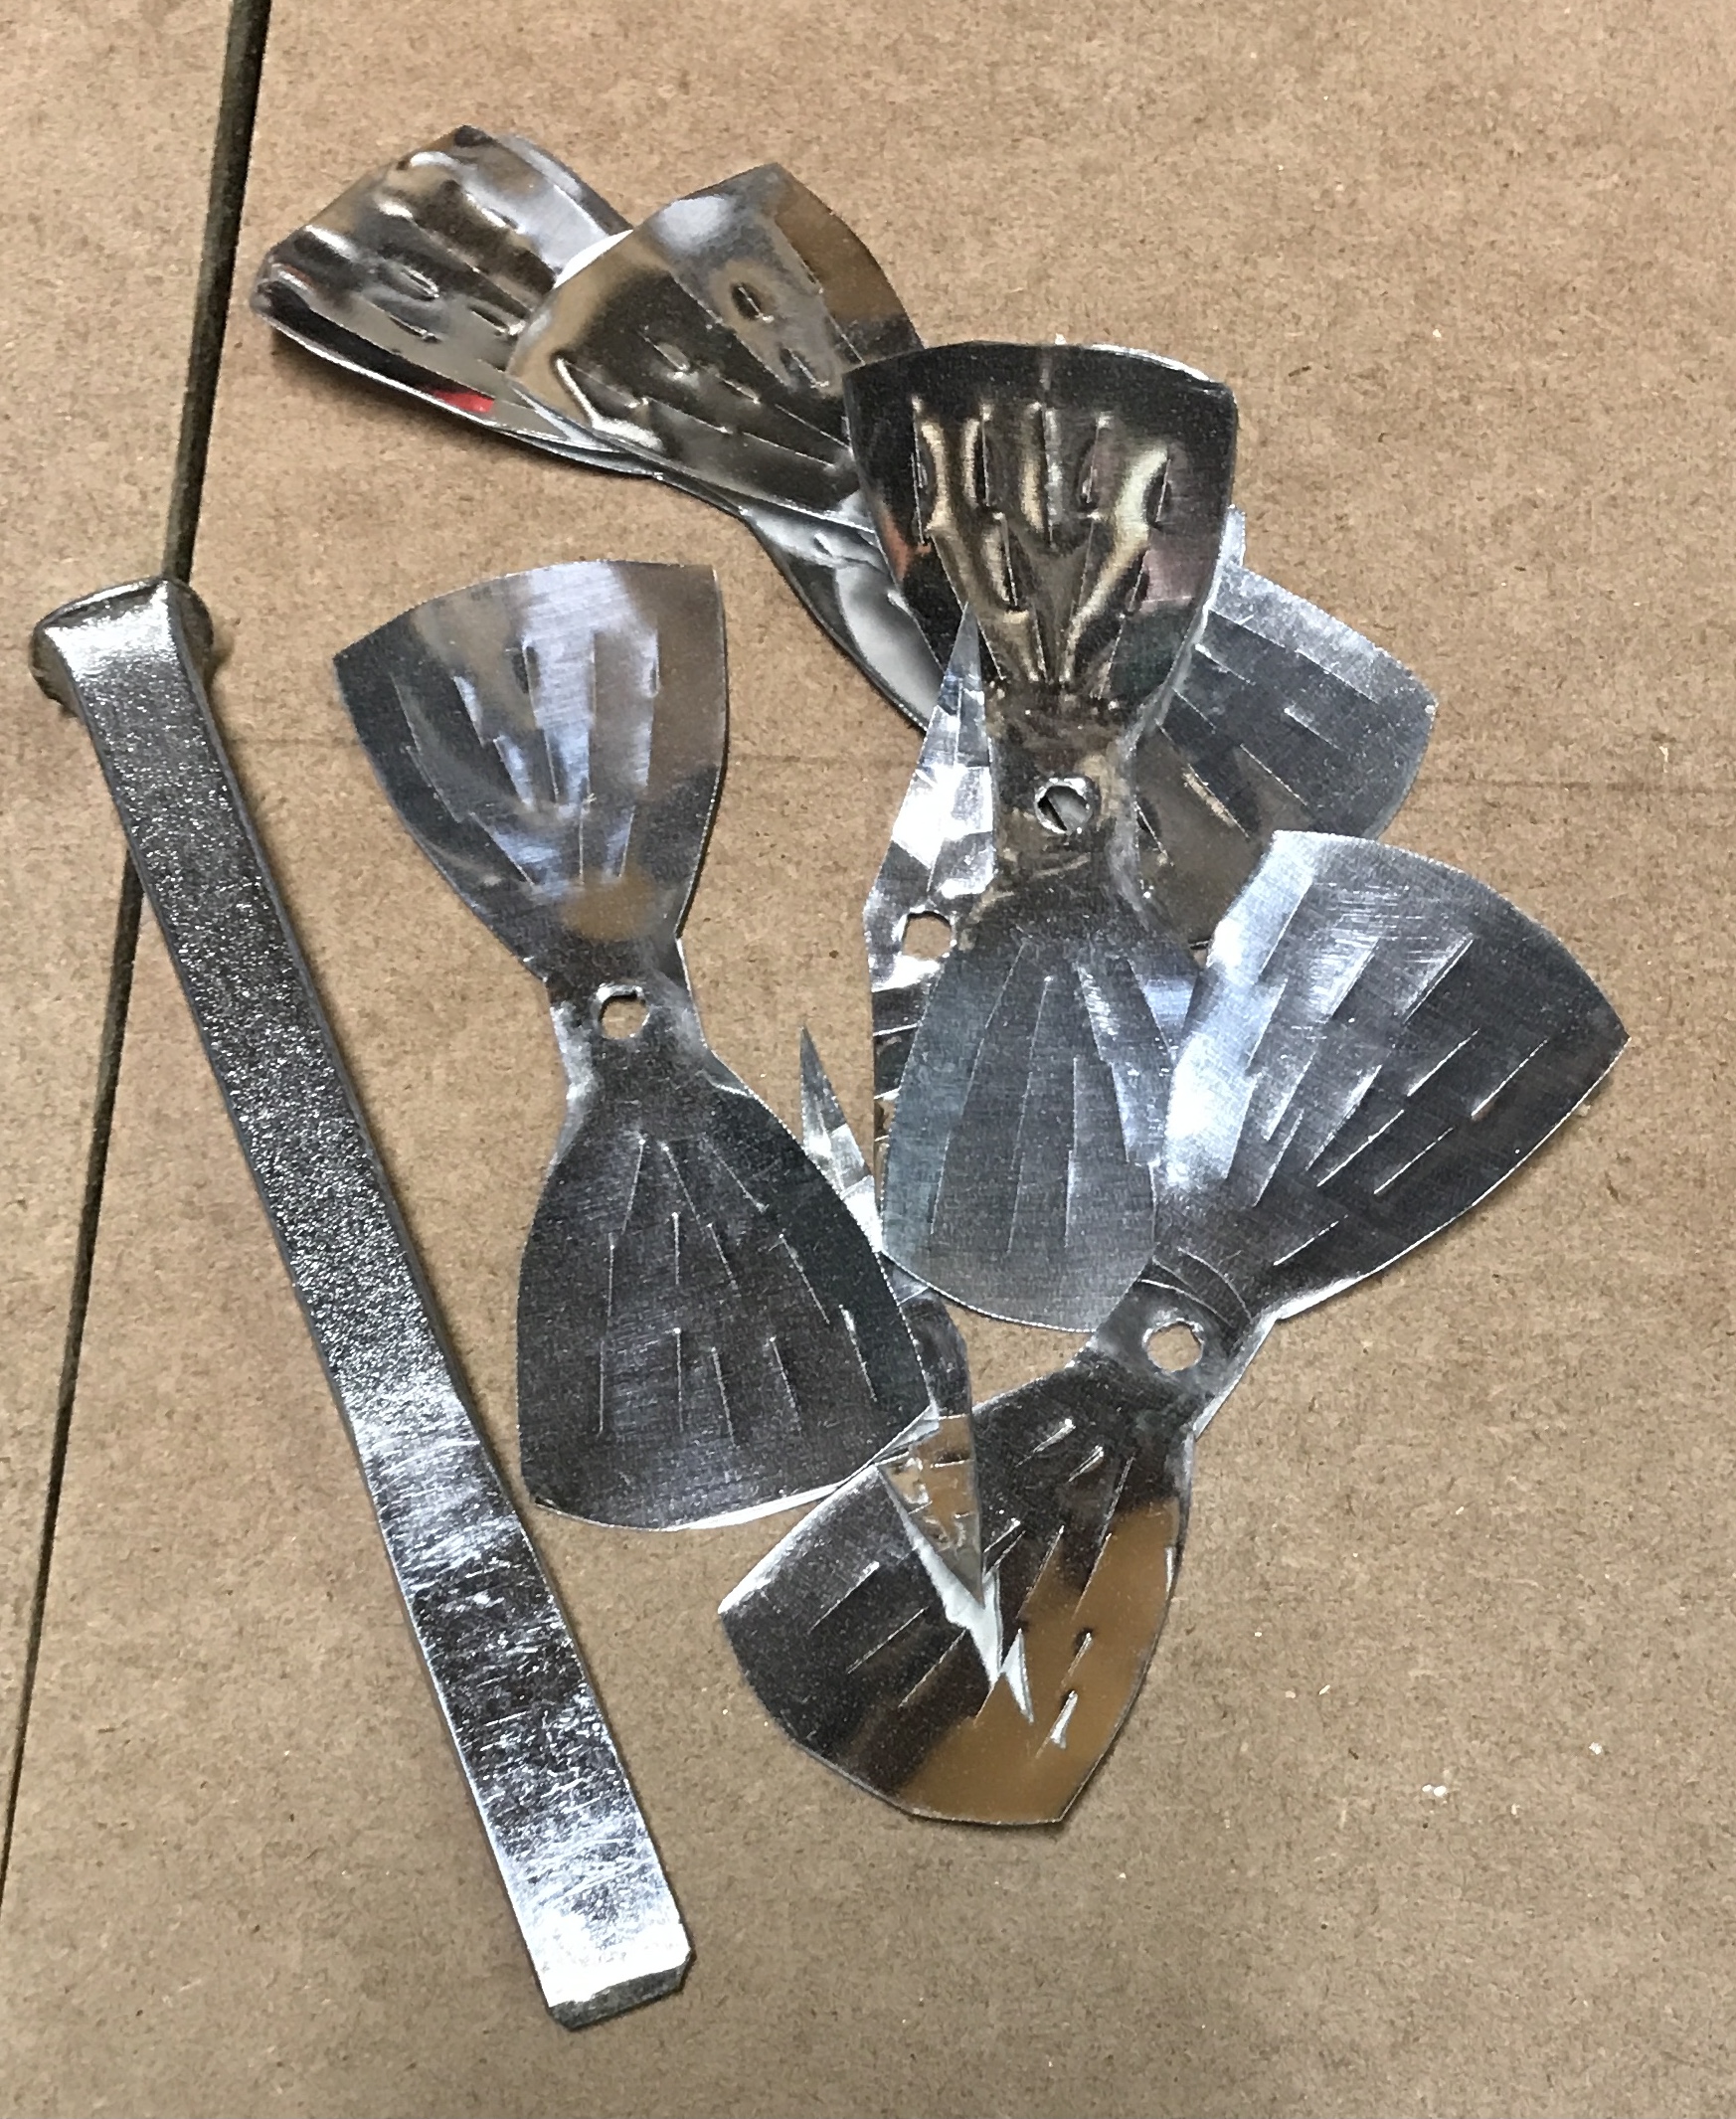
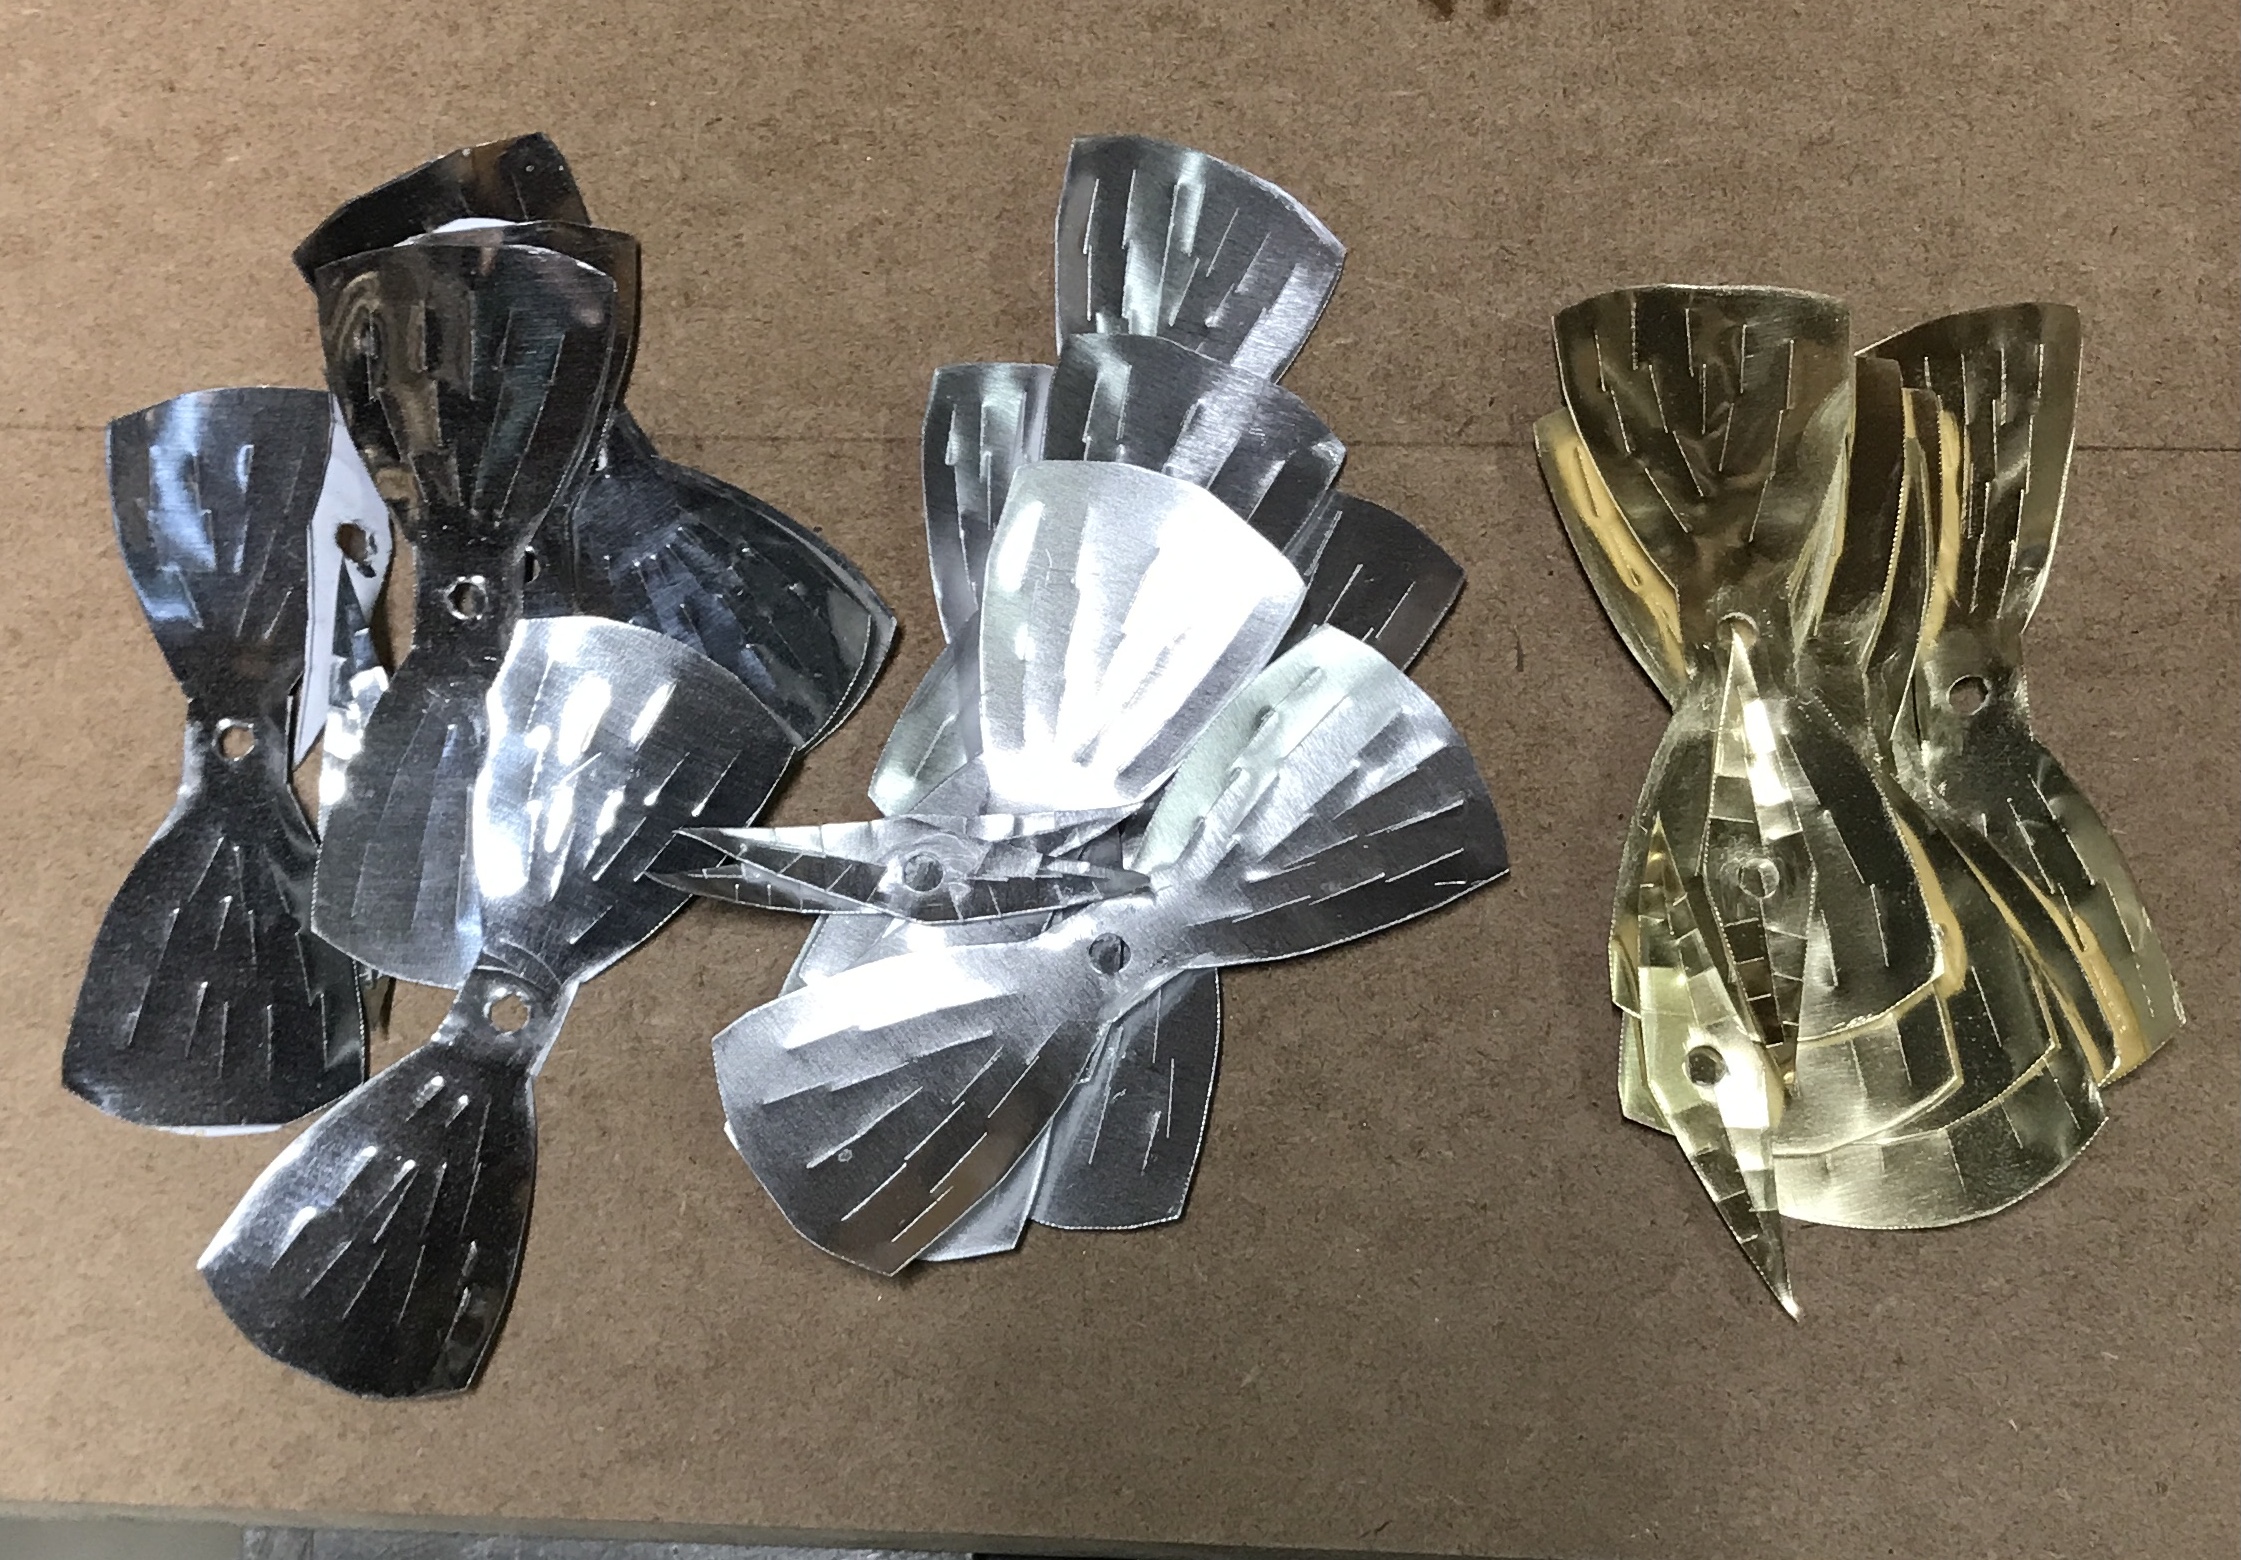
The paper was peeled off of the back. It came off easily especially if it was still wet with acetone and had soaked for five to ten minutes. Removing the paper left a lot of glue as seen in the first photo below. Luckily, the glue could be rubbed off with a rubber glove. The second photo shows all of the cleaned parts. At this time any burrs from the cutting were removed and the holes were cleaned up as needed. The ends of the petals were also slightly bent with a pair of needle nose pliers.
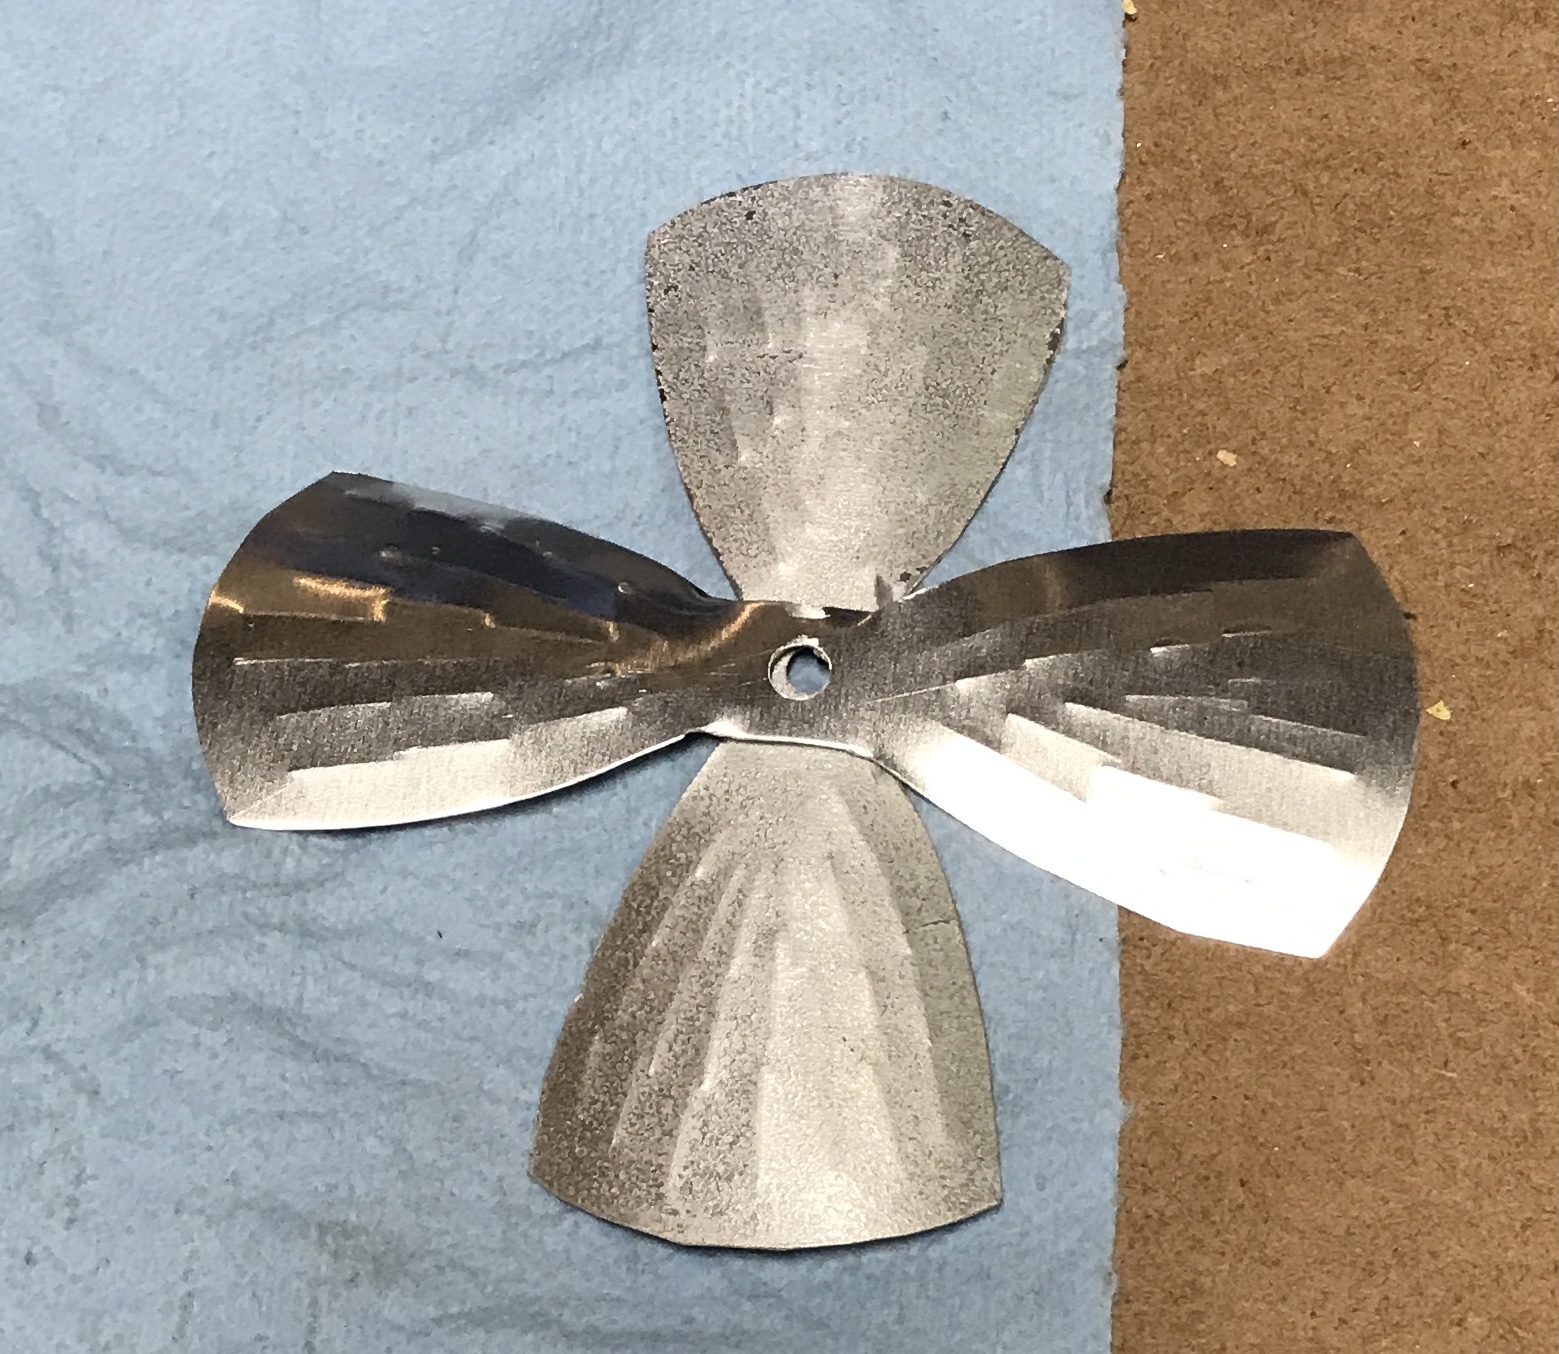
I decided to pair the brass petals with the aluminum leaves and the steel stem. A 10" length of 1/4" drill rod was cut. It was faced on both ends and one end was reduced to 0.185" for 0.250". (Too long!) The center part of the petals was flattened with a ball peen and they were placed on the stem after the leaves. They were arranged in alternating positions around the circle. The end of the shaft was peened to hold the petals in place. This was quite the challenge for the steel shaft, but was eventually completed when the big peen was retrieved from the garage. The photo shows the successful peening.
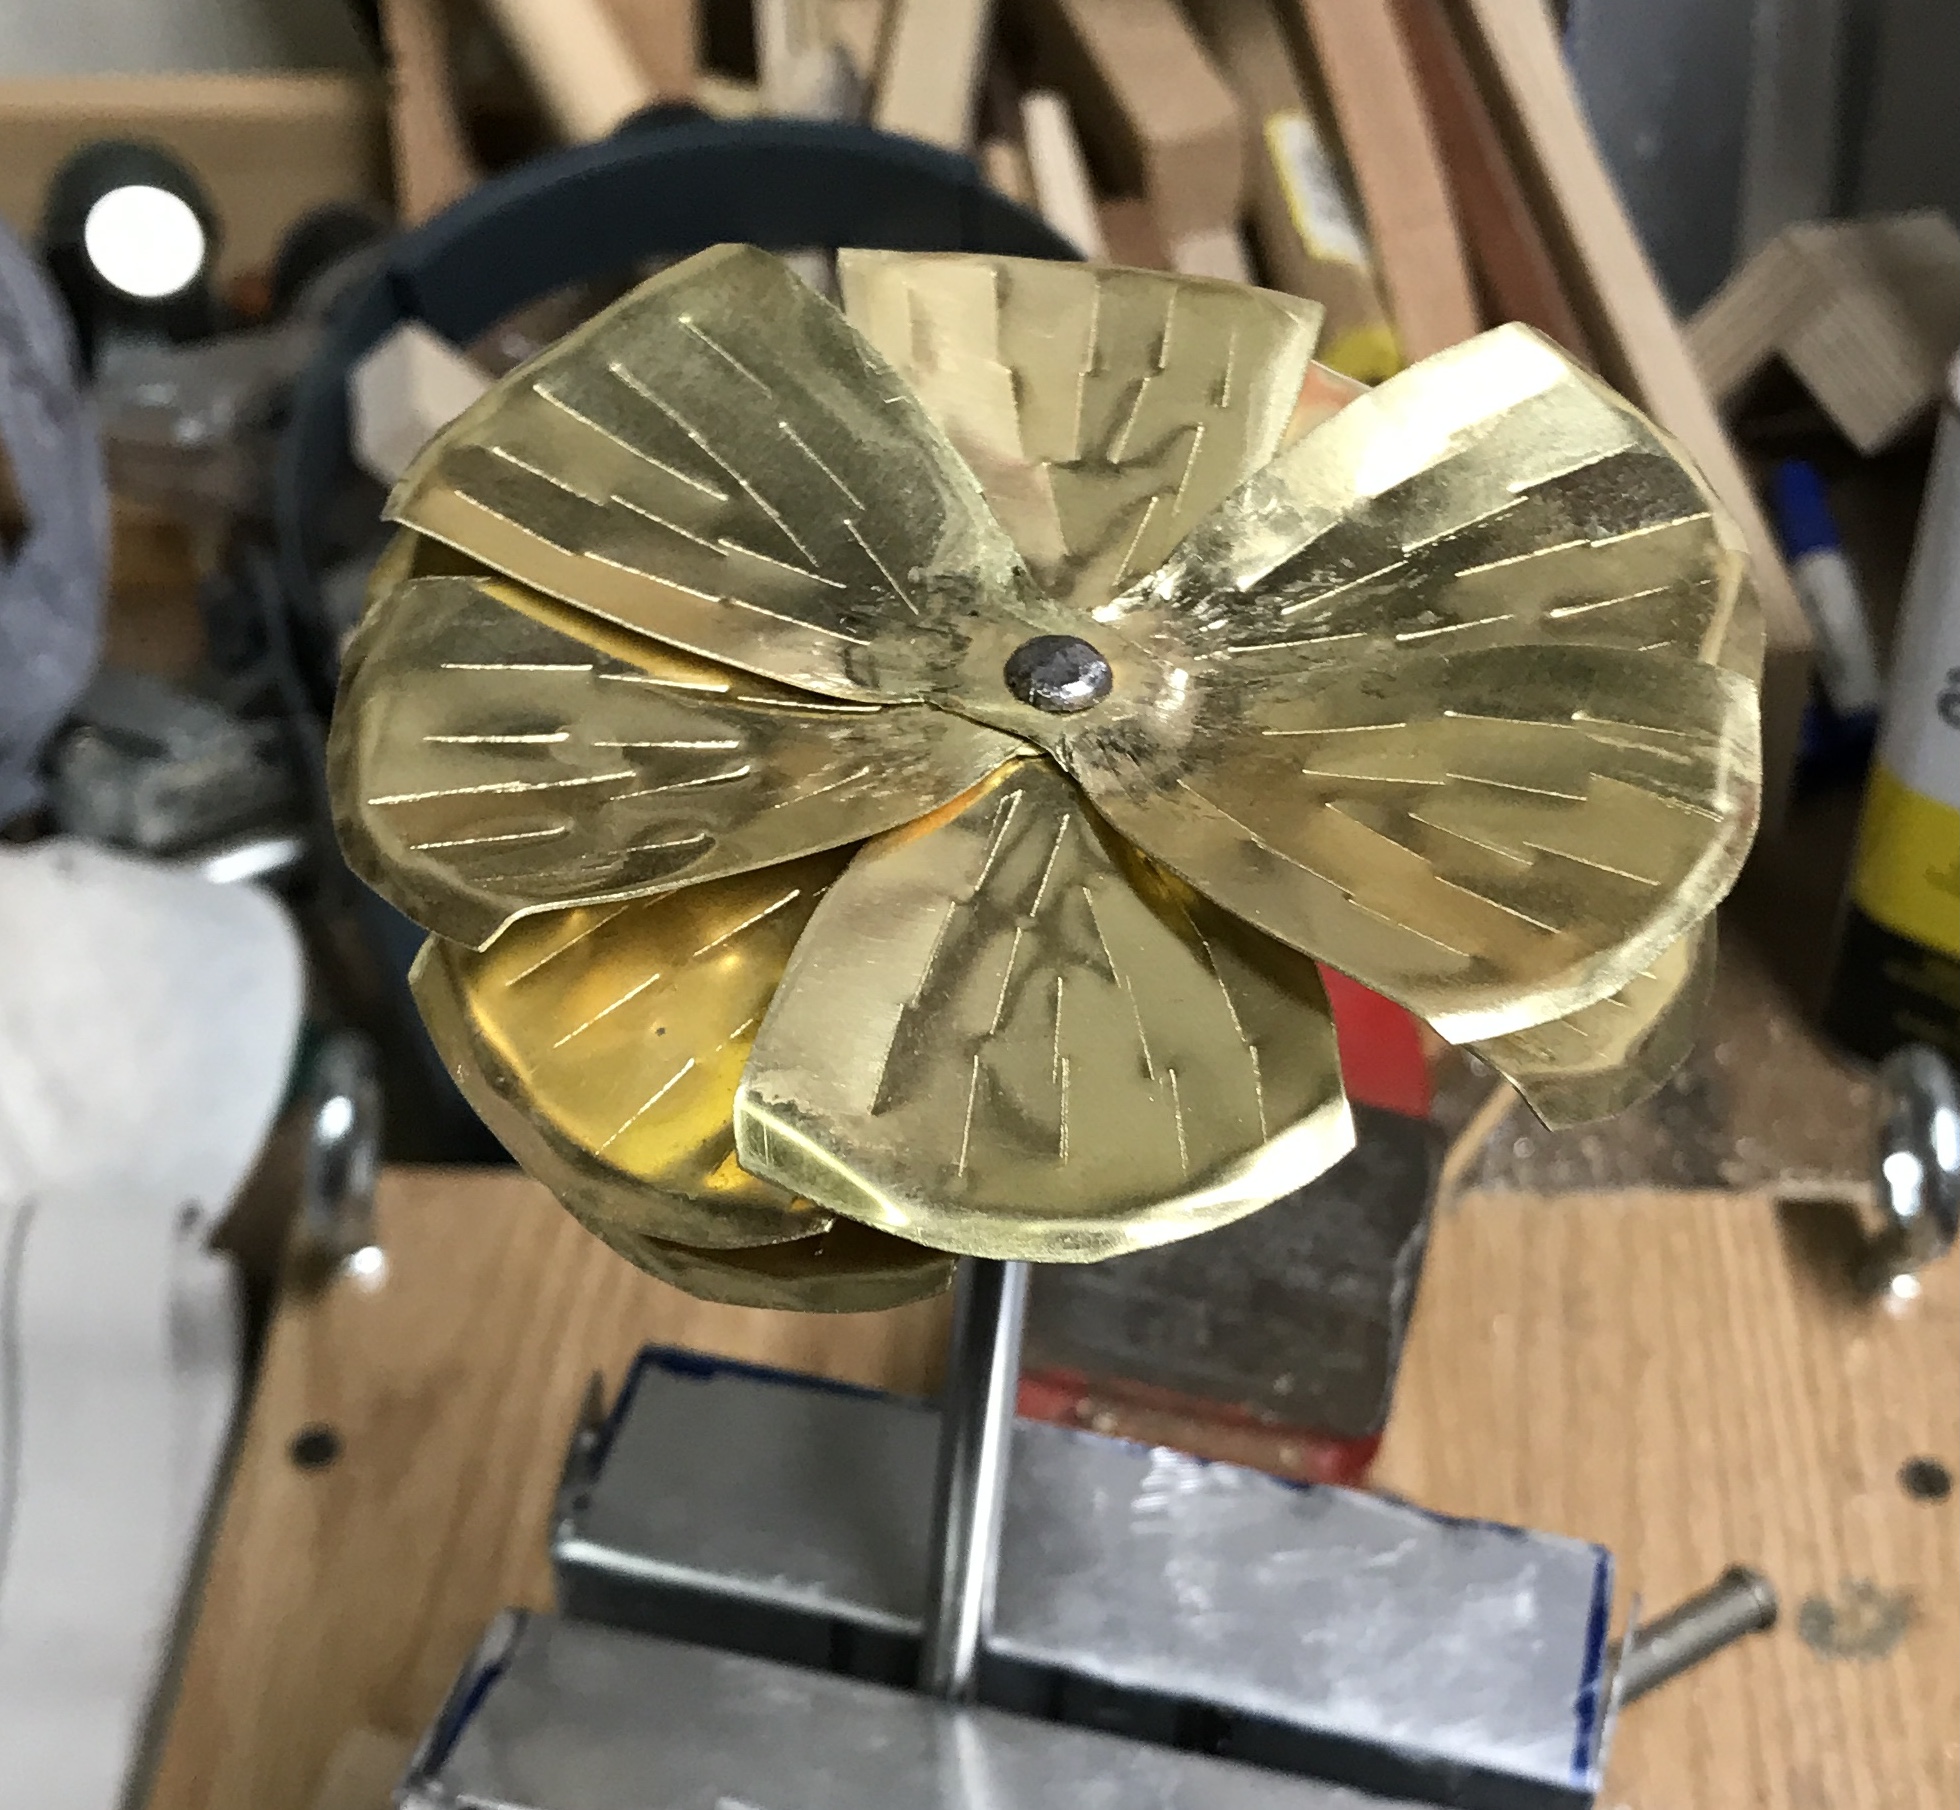
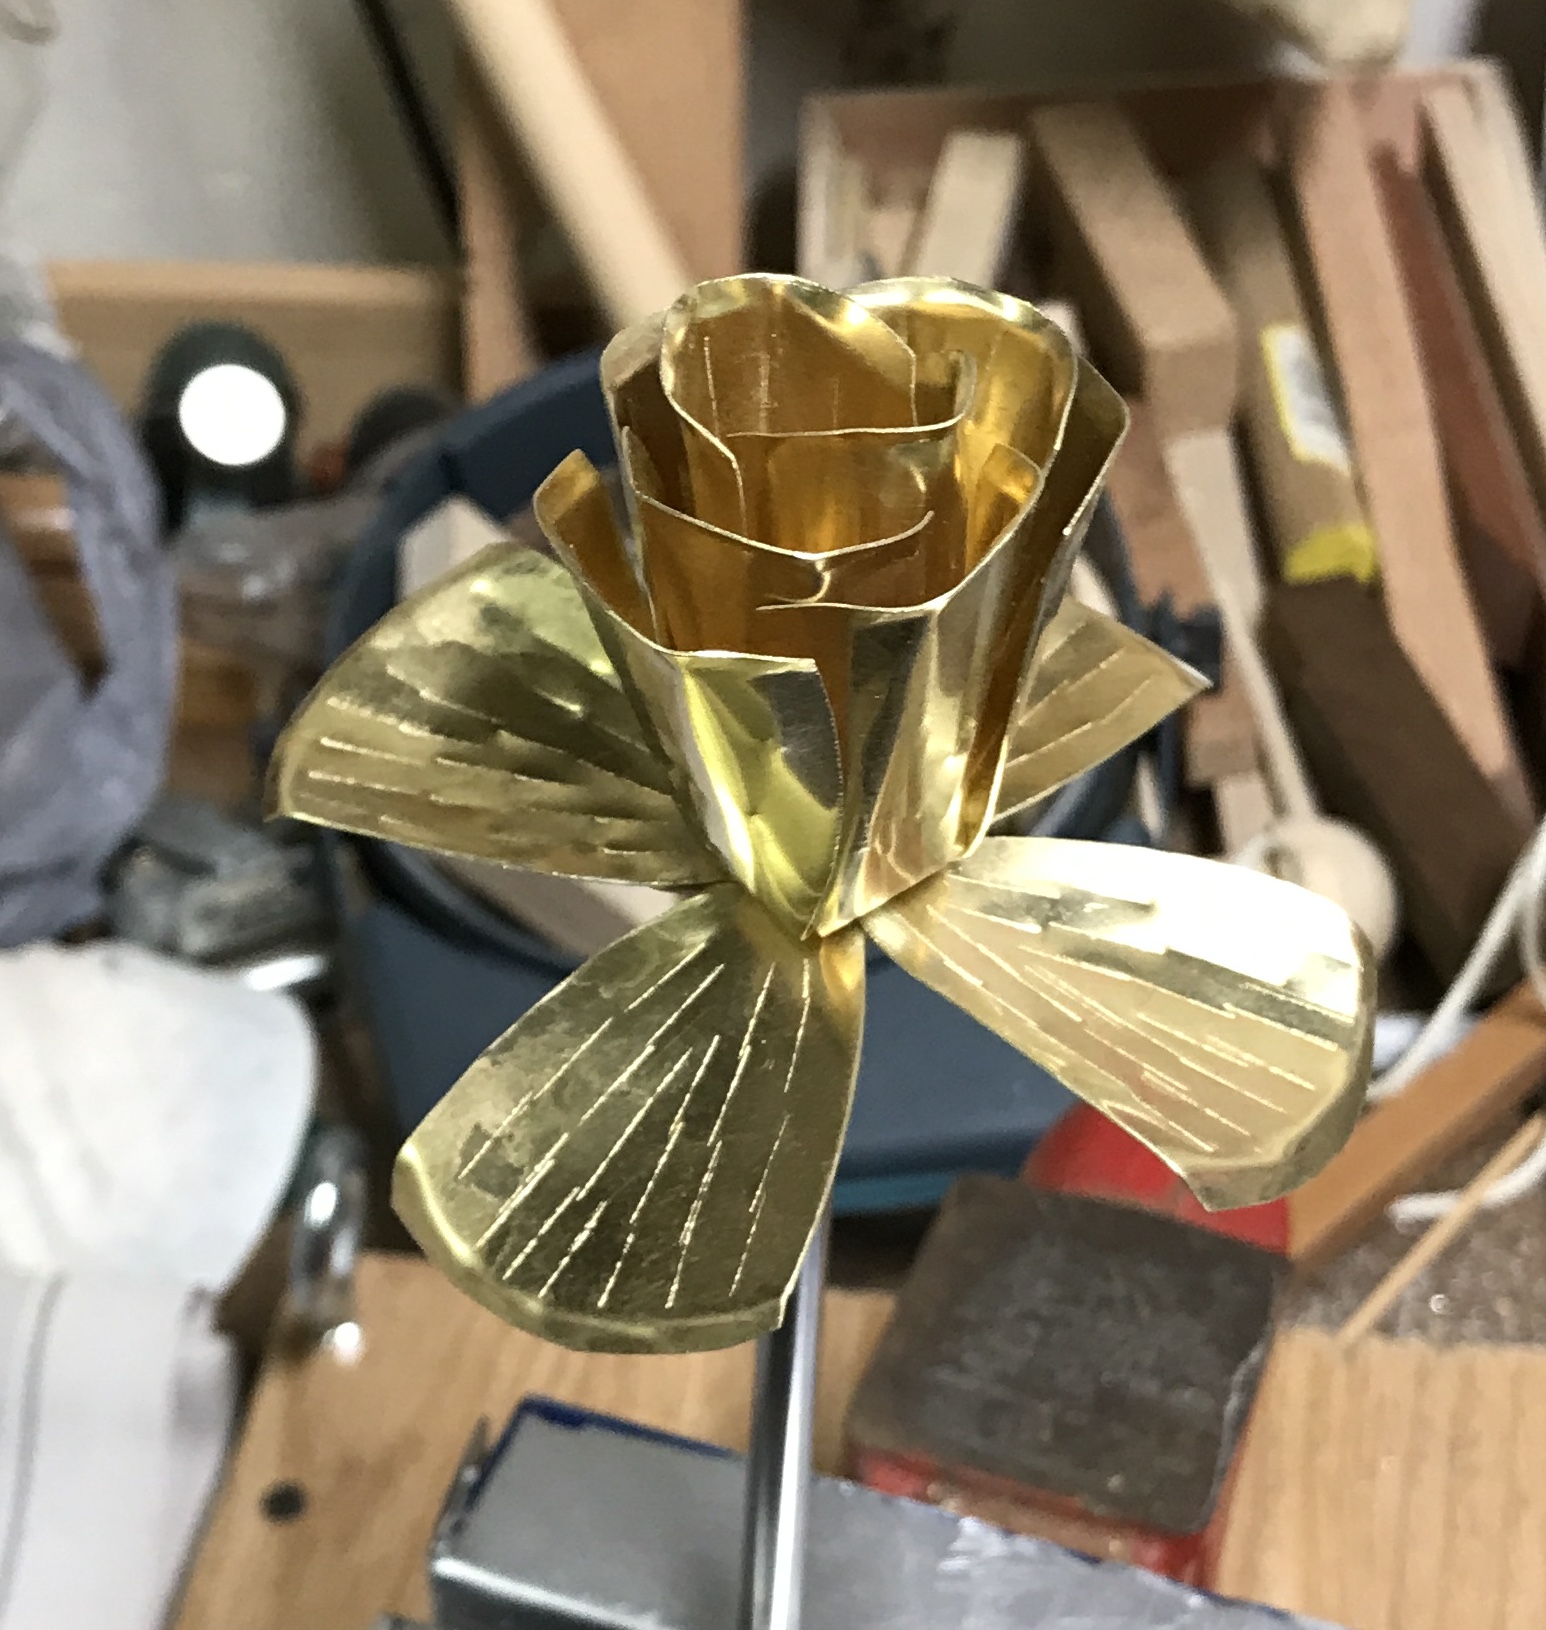
The petals were then individually shaped and bent vertically. The inner petals were rounded the most. The bottom stayed fairly square, but it is not too noticeable. The leaves were bent down slightly. The brass rose is shown below.
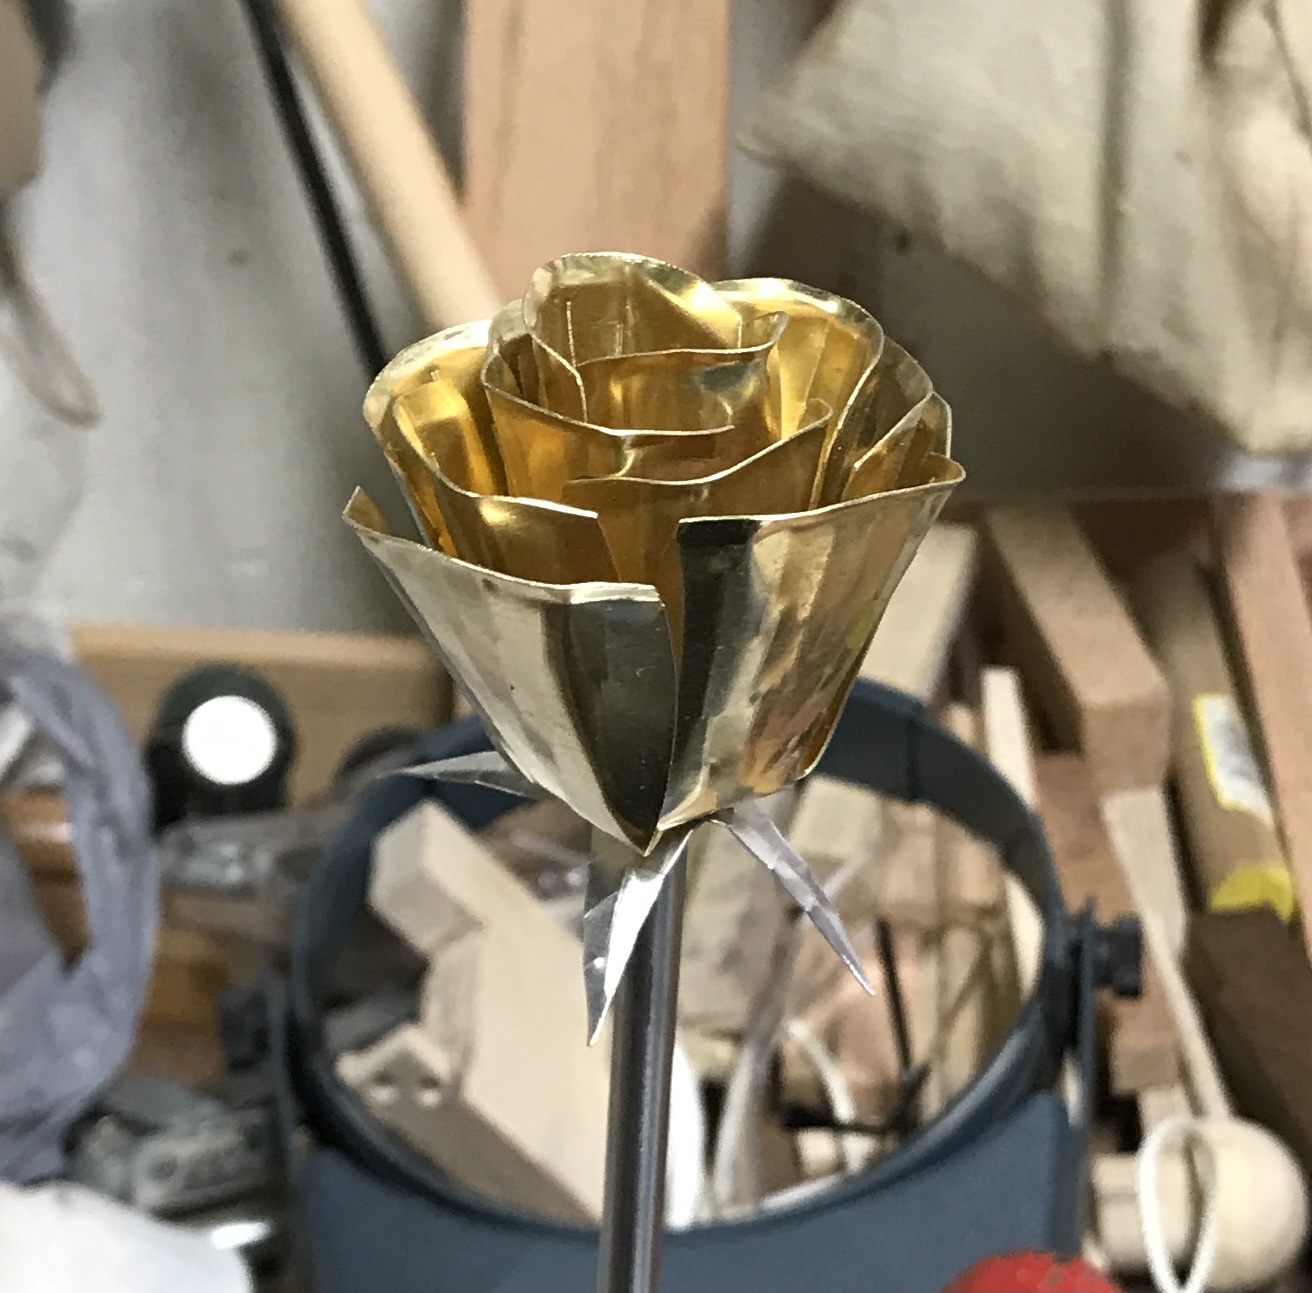
This process was repeated. The tin plated steel petals were paired with the brass leaves and the aluminum stem. The aluminum petals were accompanied by the steel leaves and the brass stem. After these two roses were completed all three stems were artfully bent. The next two photos show the completed roses in the vise vase. I have not decided whether I will paint a clear varnish on the roses to prevent tarnishing. I am really impressed with how they came out. Thank-you Stuart!
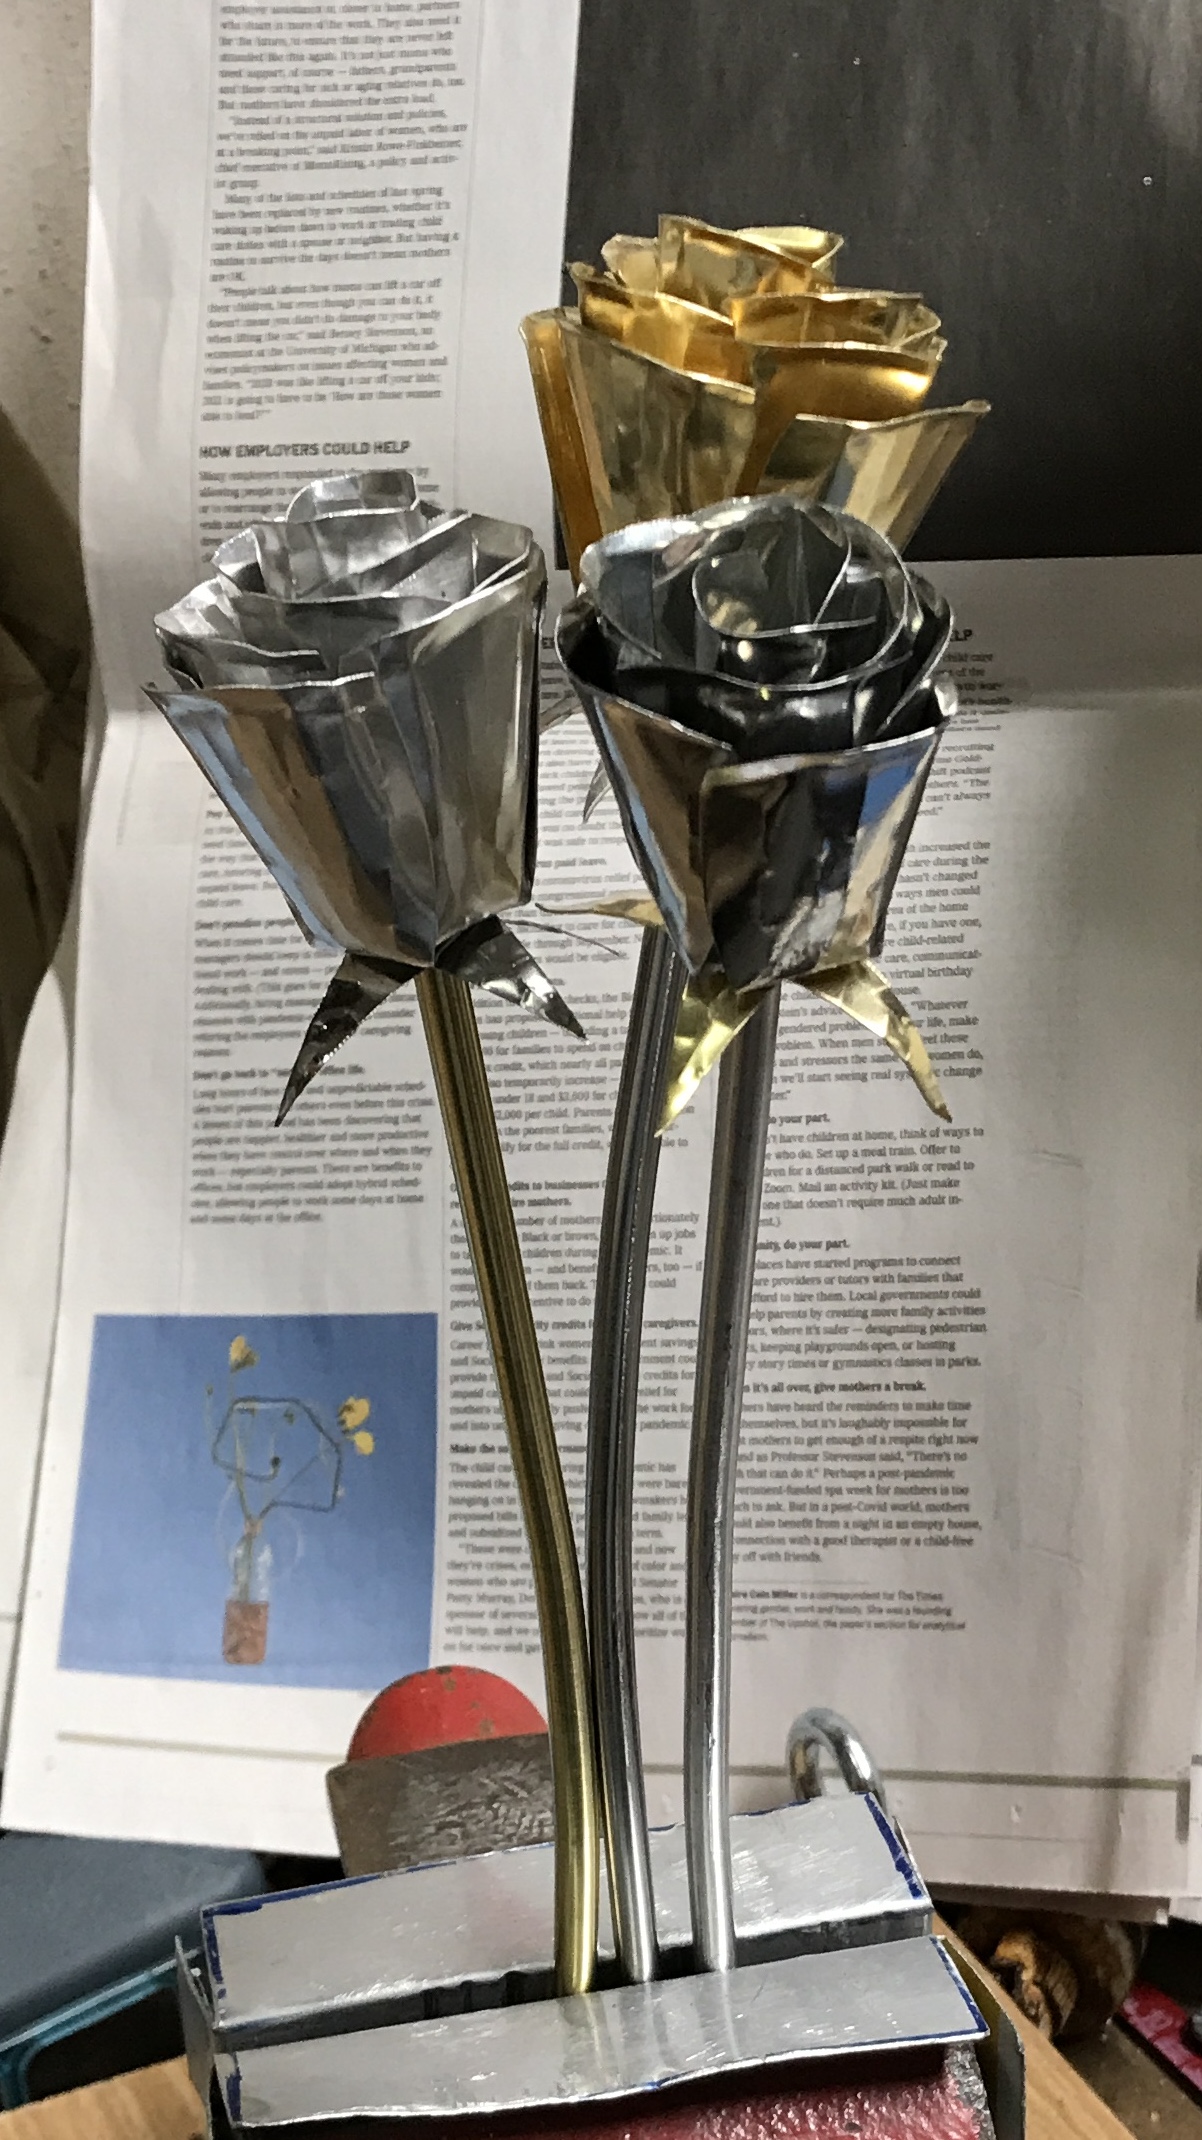

Decided in favor of varnishing. This morning a coat of Protect-a-Clear was put on the inside and outside of the rose petals and on the leaves. The roses were thoroughly enjoyed by Rhea on Valentine’s day morning.